
To replace your cabin air filter, first locate the access panel, usually behind the glove box or under the dashboard. Carefully remove screws or clips, then take out the old filter, noting its orientation. Insert the new filter in the same way, making sure it fits snugly without gaps. Reassemble the panel and start your vehicle’s HVAC system to check airflow. For detailed steps and tips, keep exploring how to do it right.
Key Takeaways
- Locate the cabin air filter access point, typically behind the glove box or under the dashboard.
- Remove the access panel or glove box carefully, noting how it attaches.
- Take out the dirty filter, remembering its orientation for proper installation.
- Insert the new filter securely, ensuring it fits snugly without gaps.
- Reassemble the access panel, start the vehicle, and run the HVAC system to verify airflow quality.
Replacing your cabin air filter is a simple maintenance task that can improve your vehicle’s air quality and HVAC system performance. When you swap out a dirty filter, you’ll notice cleaner air inside your car, making your drives more comfortable and healthier. Regular filter maintenance is essential because it prevents dust, pollen, and other pollutants from circulating through your vehicle’s ventilation system, which can lead to allergies or respiratory discomfort. Keeping an eye on your filter’s condition ensures your AC and heater work efficiently, saving you money on energy and repairs down the line.
Replacing your cabin air filter keeps your interior air clean and your HVAC system running smoothly.
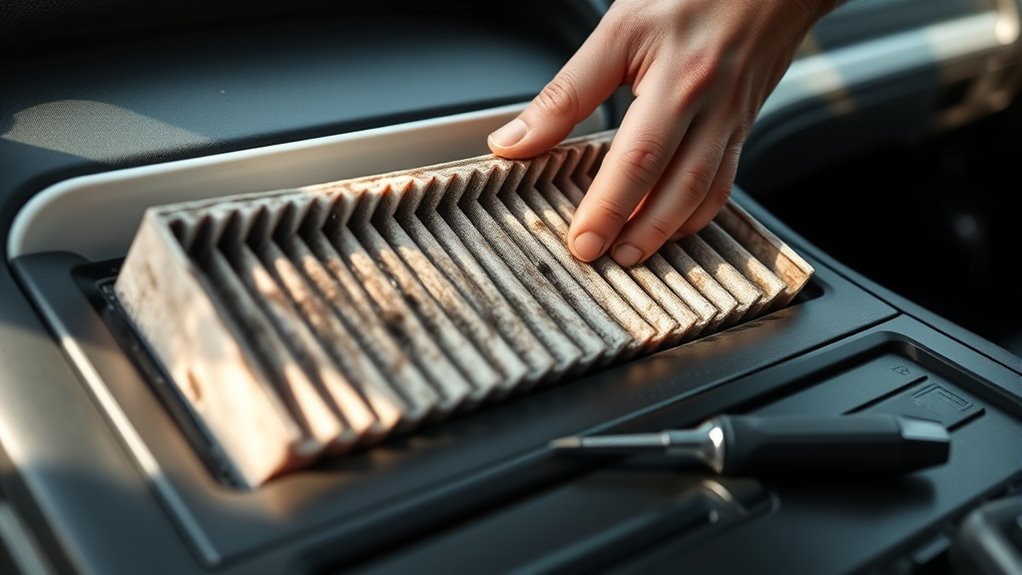
Before you begin, gather the right replacement filter for your vehicle’s make and model. Most auto parts stores can help you find the correct size and type. Once you have the new filter, make sure your engine is off and your vehicle is parked on a flat surface. Open the glove box or access panel where the filter is located—this varies by vehicle. In many models, you’ll need to remove screws or clips to get into the filter compartment. Be gentle but firm to avoid damaging any surrounding plastics or components. As you open the panel, you might see a dirty, dust-laden filter. Take note of how it sits so you can install the new one correctly.
Carefully remove the old filter, noting its orientation, as most filters are designed to fit only one way. Dispose of the used filter properly, and then insert the new filter in the same orientation. Make sure it fits snugly and securely, without any gaps around the edges. Once the filter is in place, reassemble the access panel or glove box, tightening screws or clips if necessary. Turn on your vehicle and run the HVAC system for a few minutes to ensure everything is working smoothly, and airflow feels clean and fresh. Regular inspection of air filtration systems can help you determine when it’s time for a replacement.
Replacing your cabin air filter regularly is a straightforward way to boost your air quality and maintain ideal filter maintenance. It’s an inexpensive task that pays off by preventing pollutants from entering your vehicle’s interior and ensuring your ventilation system functions efficiently. Remember, a clean filter not only improves air quality but also prolongs the life of your HVAC system. Make this a routine part of your vehicle upkeep, especially if you often drive in dusty or polluted environments. The process takes only a few minutes but can have a significant impact on your comfort and health while on the road.
Frequently Asked Questions
How Often Should I Replace My Cabin Air Filter?
You should replace your cabin air filter every 15,000 to 30,000 miles, or roughly once a year, to maintain good air quality inside your vehicle. If you notice reduced airflow or musty odors, it’s a sign the filter’s lifespan is up. Regular replacement guarantees clean air, prevents allergens buildup, and keeps your HVAC system working efficiently. Check your owner’s manual for specific recommendations based on your driving conditions.
Can I Use a Generic Filter Instead of OEM?
Yes, you can use a generic filter instead of OEM, but you should check filter compatibility first. Generic filters often cost less, but OEM filters are designed specifically for your vehicle, ensuring ideal fit and performance. Consider the quality and filtration level when choosing between OEM vs generic. If you prioritize longevity and precise fit, OEM is usually better, but a high-quality generic might suffice for regular use.
What Are Signs My Cabin Filter Needs Replacing?
You’ll notice your cabin filter needs replacing if the air quality inside your vehicle worsens, with musty or foul odors lingering longer than usual. Reduced airflow from the vents is a clear sign, and you might also experience difficulty in odor reduction. Additionally, if you or your passengers start sneezing or coughing more often, it indicates the filter isn’t effectively trapping dust and allergens anymore. Regular replacement keeps your cabin fresh and air clean.
Is Replacing the Cabin Air Filter Difficult for Beginners?
Replacing a cabin air filter isn’t nearly as tough as DIY challenges make it seem, even if you’re a beginner. Sure, you’ll need a few basic tools, like screwdrivers, but it’s straightforward and rewarding. You might joke about how it’s harder to open a jar, but with patience, you’ll find it’s a simple task that improves your car’s air quality quickly. Just follow instructions, and you’ll do great!
How Can I Tell if My New Filter Is Installed Correctly?
You can tell your new filter is installed correctly by checking the airflow; it should feel strong and consistent when you turn on the AC or heater. Do a seal check around the filter to verify it’s snug and no air is bypassing it. Also, listen for any unusual noises. If airflow improves and the seal is tight, you’ve successfully installed the filter properly.
Conclusion
Now that you’ve replaced your cabin air filter, you’re all set to enjoy fresh, clean air on every drive. Remember, just like a trusty steed needs its saddle, your car needs regular upkeep to run smoothly. Don’t forget to check it every 12,000 to 15,000 miles or once a year. With your newfound skills, you’re ready to tackle this task anytime—no need to call upon Merlin or a wizard!