
To restore cloudy headlights yourself, start by thoroughly cleaning them with soap and water, then mask off surrounding areas to avoid scratches. Use a headlight restoration kit or a homemade polish, applying it in small sections with a soft cloth or buffer in circular motions. After polishing, apply a UV sealant to protect against future oxidation. Consistently maintaining these steps can keep your headlights clear and bright; keep going to discover even more effective tips.
Key Takeaways
- Clean and dry headlights thoroughly, then mask surrounding areas to prevent scratches during polishing.
- Use a headlight restoration kit or homemade polish to remove oxidation with circular buffing motions.
- Apply a UV protective sealant or coating after polishing to prevent future cloudiness.
- Reapply UV protection regularly to maintain clarity and extend the headlight’s lifespan.
- Follow proper curing and maintenance steps for long-lasting, clear headlights.
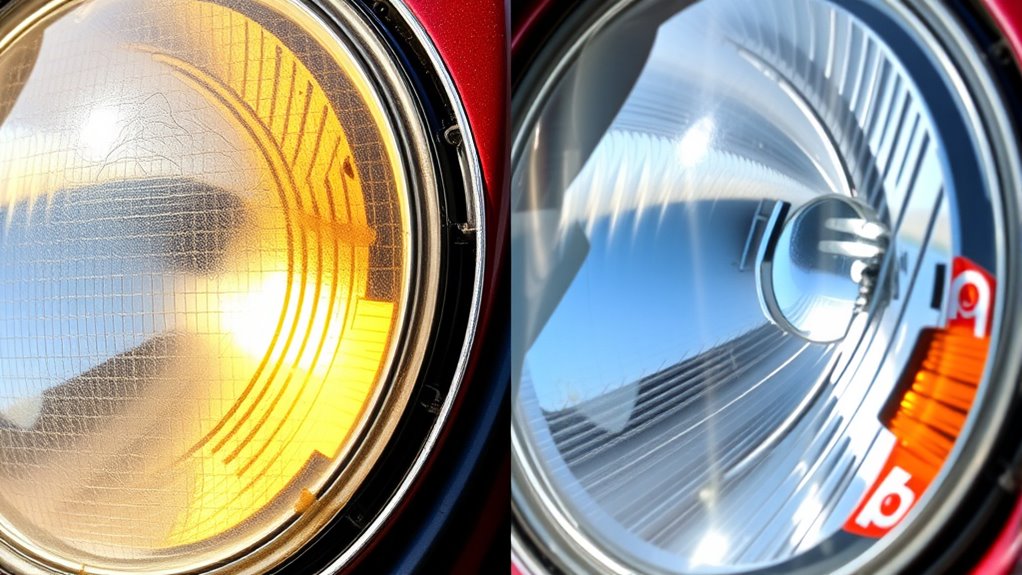
Are your car’s headlights cloudy and dim, making night driving more dangerous? If so, you’re not alone. Over time, exposure to UV rays, road debris, and harsh weather causes the plastic lenses to oxidize and develop a cloudy film. Luckily, restoring them yourself is quite feasible with some simple DIY methods. One of the most effective ways to improve clarity involves understanding UV protection and polishing techniques. These play a essential role in not only restoring your headlights but also protecting them from future damage.
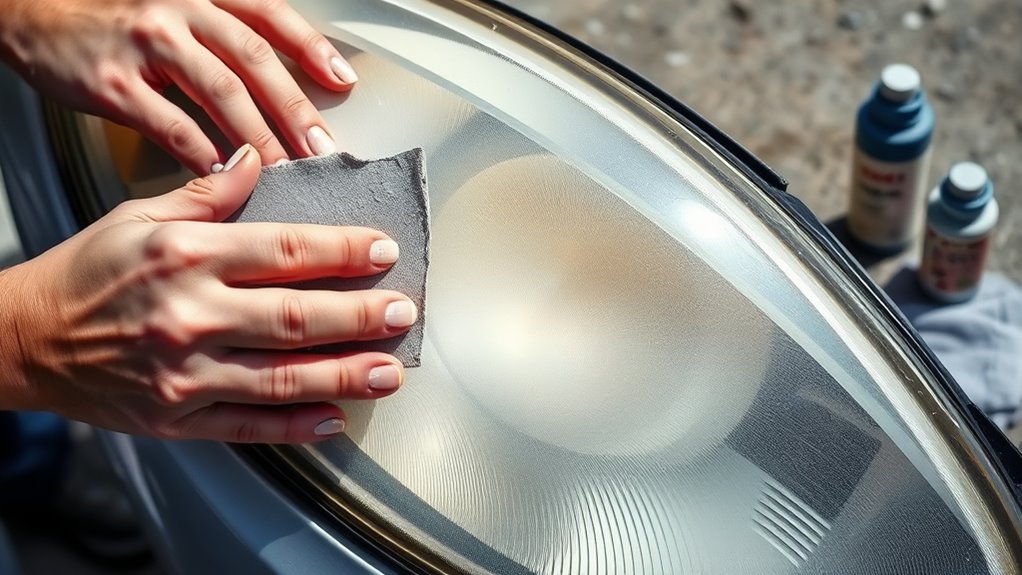
First, it’s important to remove the oxidation that’s causing the cloudiness. You’ll want to start by thoroughly cleaning the headlights with soap and water to eliminate dirt and grime. Once dry, masking off the surrounding paint with painter’s tape prevents accidental scratches. Now, to address the oxidation, you’ll need to use a headlight restoration kit or make your own solution. Many kits include a polishing compound designed specifically for headlights, which helps remove the oxidized layer and restores clarity. When using polishing techniques, it’s imperative to work in small sections, applying the compound with a soft cloth or a buffer pad, and rubbing in circular motions. This process smooths out the surface and reveals the clear plastic beneath.
Start by cleaning headlights thoroughly, then mask surrounding areas before polishing with a specialized compound.
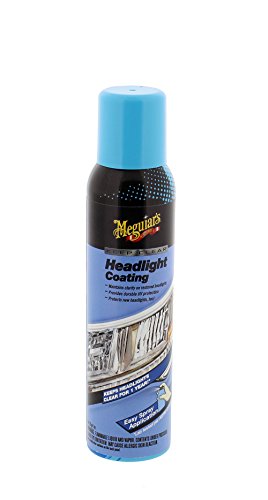
In addition to polishing, applying a UV protection coating is essential. The UV rays from the sun are a primary cause of headlight deterioration, so after polishing, you want to apply a sealant or a dedicated UV protective spray. This step creates a barrier that markedly slows down future oxidation and clouding. Many kits come with a UV protector, but you can also purchase standalone sprays designed for automotive plastics. Make sure to evenly coat the headlight surface and allow it to cure as per the product instructions. Regularly reapplying this UV protection can extend the life of your restored headlights and keep them looking clear longer. Utilizing a specialized UV coating can significantly enhance the longevity of your restoration efforts.
The key to a successful DIY headlight restoration is patience and attention to detail. Proper polishing techniques combined with a good UV protection layer will not only clear up the cloudy appearance but also shield your headlights from the sun’s harmful rays. This way, you save money and time while improving your vehicle’s safety and appearance. With just a little effort and the right approach, you can restore your headlights to near-new clarity and enjoy safer night drives in the future.

CERAKOTE® Ceramic Headlight Restoration Kit – Guaranteed To Last As Long As You Own Your Vehicle – Brings Headlights Back to Like New Condition – No Power Tools Required – 10 Wipe Kit
KIT CONTENTS – Each headlight restoration kit includes (8) Step 1 Oxidation Removing Wipes, (1) Step 2 Sanding…
As an affiliate, we earn on qualifying purchases.
As an affiliate, we earn on qualifying purchases.
Frequently Asked Questions
How Long Does a DIY Headlight Restoration Last?
Your DIY headlight restoration typically lasts between 1 to 3 years, depending on factors like UV protection and your driving conditions. Applying a UV-resistant sealant can extend its lifespan, preventing yellowing and cloudiness. It’s a cost-effective option compared to professional services, saving you money initially. However, you’ll need to reapply the treatment periodically to keep headlights clear and bright, especially if exposed to harsh weather or sunlight.
Can I Restore Headlights on All Vehicle Types?
Think of your headlights as the eyes of your vehicle’s soul. You can restore headlight clarity on nearly all vehicle types, but compatibility varies. Some materials and designs respond better to DIY methods, ensuring universal application. However, older or specialty vehicles might need professional help for ideal results. So, yes, you can attempt restoration across various vehicles, but always consider specific needs to achieve the best clarity and shine.
Are There Any Safety Precautions I Should Take?
Yes, you should take safety precautions when restoring headlights. Always wear protective gear like gloves and goggles to shield your skin and eyes from chemicals. Handle any cleaning or polishing chemicals carefully, following the instructions on their labels. Work in a well-ventilated area to avoid inhaling fumes. Taking these steps helps prevent injuries and guarantees a safe, successful restoration process.
What Tools Are Essential for Headlight Restoration?
Think of your tools as the keys to unblocking clarity. You’ll need abrasive pads to gently sand away fog and oxidation, revealing your headlight’s true shine. A polishing compound acts as the polish on a gem, restoring brightness and smoothness. Together, these essentials help you restore your headlights effectively, turning cloudy lenses into clear visions ahead, symbolizing a fresh start and a brighter journey on the road.
Is Professional Restoration More Effective Than DIY Methods?
Professional restoration is typically more effective than DIY methods because experts use specialized tools and techniques, ensuring longer-lasting results. While DIY methods are cheaper upfront, they may require frequent touch-ups, costing more over time. If you want a quick, reliable fix, professional services are worth the cost comparison, especially for severely foggy or damaged headlights. Ultimately, professional restoration offers durability and quality that DIY can’t always match.

3M Ultra Headlight Restoration Kit, Contains Masking Tape, Light Sanding Discs, Wax Protectant and More, Use on Plastic Lenses Headlights, Taillights and More, Easy Heavy-Duty Restoration (39195)
KIT INCLUDES: 1 – Disc Pad Holder, 3.25 in (8,2 cm) 6 – 3M Gold Sanding Discs 500…
As an affiliate, we earn on qualifying purchases.
As an affiliate, we earn on qualifying purchases.
Conclusion
Now that you know these simple DIY headlight restoration methods, why pay for costly repairs when you can do it yourself? With a few basic supplies and some effort, you can restore your headlights to a clear, like-new shine. Isn’t it satisfying to save money and improve your car’s appearance all at once? Give these techniques a try and enjoy the bright, safe driving experience you deserve. Ready to bring your headlights back to life?
Meguiar's Keep Clear Headlight Coating, Maintain Like-New Clarity of Your Headlights with an Easy-to-Use Formula and UV Protection that Lasts All Year Long, 4 Ounce Aerosol
CLEAR LIGHTS: Meguiar's Clear Headlight Coating is the ultimate solution to maintain exceptional optical clarity on both new…
As an affiliate, we earn on qualifying purchases.
As an affiliate, we earn on qualifying purchases.
CERAKOTE® Ceramic Headlight Restoration Kit – Guaranteed To Last As Long As You Own Your Vehicle – Brings Headlights Back to Like New Condition – No Power Tools Required – 10 Wipe Kit
KIT CONTENTS – Each headlight restoration kit includes (8) Step 1 Oxidation Removing Wipes, (1) Step 2 Sanding…
As an affiliate, we earn on qualifying purchases.
As an affiliate, we earn on qualifying purchases.