Proper surface prep is vital for epoxy coatings to stick well and avoid peeling. You need to thoroughly clean the area, remove old coatings, and repair cracks or bumps before applying epoxy. Lightly sanding and ensuring a dust-free surface create a better bond and a smoother finish. Testing the surface for moisture and adhesion helps confirm readiness. Keep going to discover how to prep your floor for long-lasting, durable results.
Key Takeaways
- Proper surface cleaning and decontamination prevent dirt, grease, and debris from causing epoxy peeling.
- Repair cracks and level bumps to ensure a smooth, even surface that resists peeling and chipping.
- Lightly sand or grind the surface to improve adhesion and remove any existing coatings or residues.
- Use primer or bonding agents as needed to enhance epoxy adhesion and prevent future peeling.
- Confirm surface readiness by testing water beading and ensuring a dust-free, dry, smooth surface.

Gorilla Epoxy Garage Floor Coating (12 pc) Kit, 2.5-Car, Concrete Flooring, 100% Solids, Superior Adhesion, Incredibly Durable High Gloss Gray Finish, 550 sq. ft. Coverage
Ultimate Protection in One Coat: 2-part 100% solids epoxy delivers, incredibly durable, exceptional resistance to chemicals, abrasions, salt,…
As an affiliate, we earn on qualifying purchases.
As an affiliate, we earn on qualifying purchases.
Why Proper Surface Prep Is Key to Epoxy Durability
Proper surface preparation is essential to guarantee your epoxy coating lasts. Without it, your epoxy won’t bond properly, leading to peeling or cracking over time. Ensuring good surface adhesion starts with thorough cleaning and decontamination, removing dirt, grease, or loose debris that can hinder bonding. Surface priming is a vital step; it creates a uniform base that improves the epoxy’s grip on the substrate. Skipping priming or rushing through prep can cause weak spots, reducing durability. When you prepare the surface correctly, you promote better adhesion and a smoother finish. Remember, the success of your epoxy coating depends on how well the surface is prepared. Using proper surface prep techniques ensures optimal bonding and long-lasting results. It’s also important to follow manufacturer instructions to avoid application errors that could compromise the coating’s performance. Investing time in proper surface testing, such as adhesion or moisture testing, can help identify potential issues beforehand. Additionally, understanding the surface material properties can influence the choice of prep methods and adhesion strategies. By doing so, you’ll set the stage for a long-lasting, professional-looking floor that withstands daily wear.

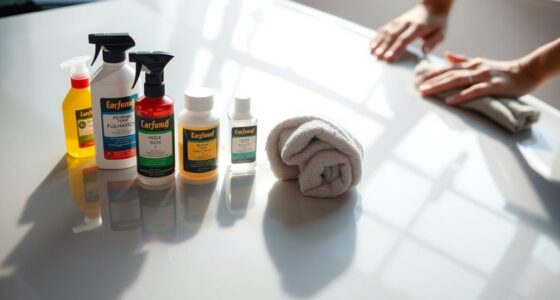
ERC #1 Epoxy Cleaner "Ready 2 Go" Pre-Diluted Gallon of ERC Epoxy & Resinous Surface Cleaner | Professional Strength | No Mixing Required | Cleans Epoxy Floors, Sealed Concrete, and More
✅ Ready-To-Use Convenience – Skip the mixing! Ready 2 Go comes pre-diluted with the perfect ratio of our…
As an affiliate, we earn on qualifying purchases.
As an affiliate, we earn on qualifying purchases.
How to Clean and Remove Old Coatings Effectively
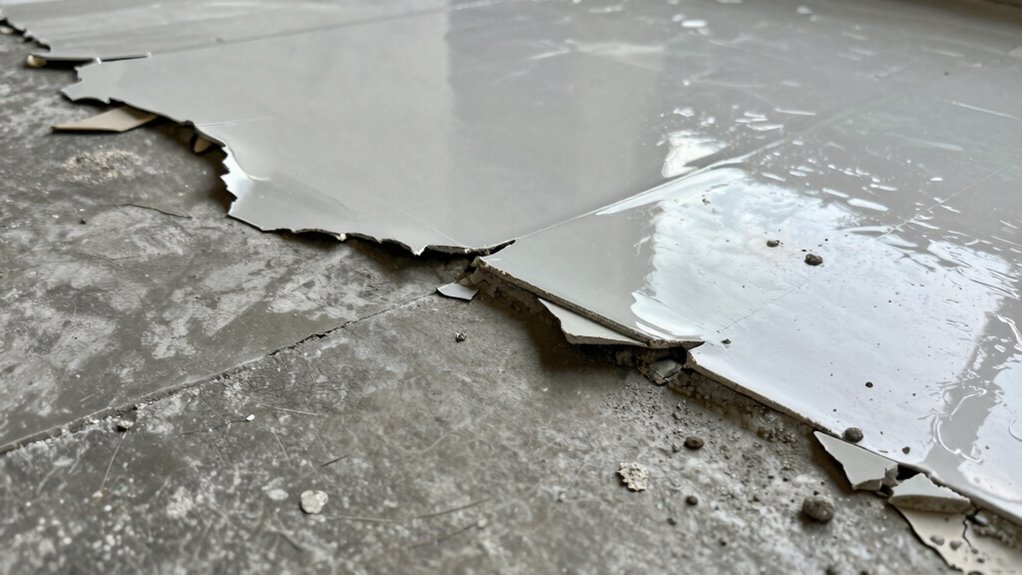
Before applying a new epoxy coating, you need to thoroughly clean the surface and remove any old coatings. Start by inspecting the existing surface to determine if chemical stripping is necessary. If so, apply a suitable chemical stripper to loosen old paint or coatings, following the manufacturer’s instructions. Next, consider power washing to eliminate dirt, grease, and loose debris, ensuring a clean surface. Additionally, evaluating the surface condition helps identify areas needing extra attention. Finally, for stubborn residues, sand or scrub the area to improve adhesion. Incorporating proper surface preparation techniques increases the longevity of your epoxy coating. Here’s a quick guide: 1. Use chemical stripping for thick or stubborn old coatings. 2. Power wash to remove dirt and debris. 3. Sand or scrub for any remaining residues or uneven spots. 4. Proper surface adhesion techniques prevent peeling and ensure durability.

Vapor Score Moisture Tester for Concrete Slab, Calcium Chloride Test Kit – Easy-to-Use Water Damage Detector and Moisture Analyzer (3-Pack)
ASTM 1869 Certified Accuracy: Reliable moisture vapor emission testing for concrete slabs to meet ASTM F1869 standards; helps…
As an affiliate, we earn on qualifying purchases.
As an affiliate, we earn on qualifying purchases.
Fix Cracks and Surface Bumps for Better Adhesion
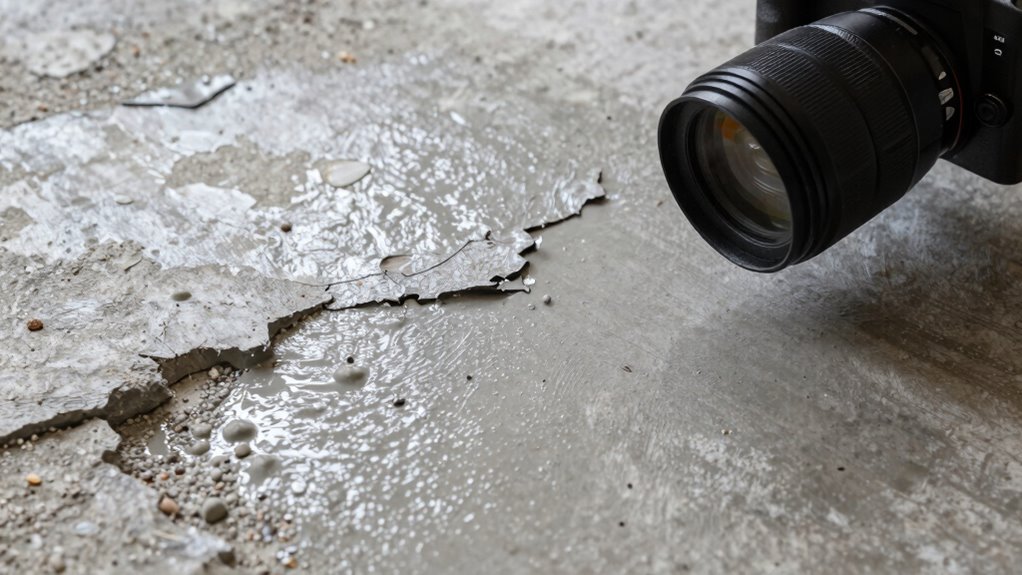
To guarantee your epoxy coating adheres smoothly and lasts longer, you need to address any cracks or surface bumps before applying the new layer. Start by inspecting the floor carefully for cracks and uneven spots. Use crack filling compounds to seal gaps, preventing them from telegraphing through the epoxy. For surface bumps, sand or grind these high spots to create a flat, even surface. Proper surface smoothing ensures the epoxy bonds effectively and reduces the risk of peeling or chipping later. Additionally, color accuracy and surface preparation techniques can significantly improve adhesion and longevity of the coating, especially when combined with correct tools and safety precautions. Ensuring a clean, dust-free surface is also crucial for optimal adhesion and a professional-looking result. Paying attention to surface cleanliness and removing all debris helps achieve a seamless finish. Taking the time to repair and level the surface now will pay off with a sleek, long-lasting epoxy finish.

INSL-X SXA11009A-04 Stix Acrylic Waterborne Bonding Primer, 1 Quart, White
Premium-quality, acrylic-urethane bonding primer-sealer with unparalleled adhesion to the most challenging surfaces, including glossy tile, PVC, vinyl, plastic,…
As an affiliate, we earn on qualifying purchases.
As an affiliate, we earn on qualifying purchases.
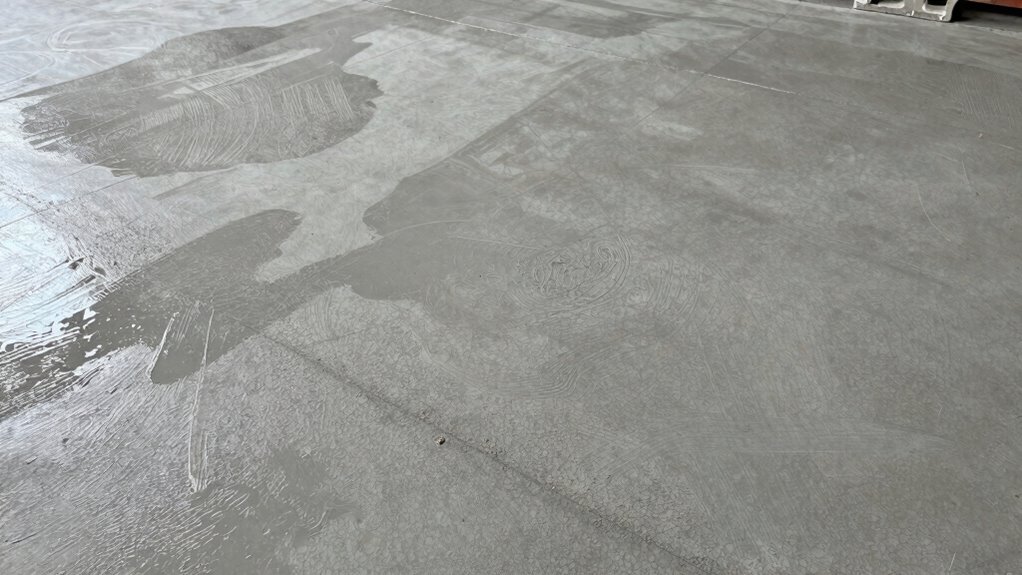
Smooth and Dust-Free: Preparing the Floor for Epoxy

Achieving a smooth, dust-free surface is essential for a flawless epoxy application. To ensure this, start by thoroughly cleaning the floor to remove dirt and debris. Next, follow these steps:
- Sand the surface lightly to create a uniform texture, which helps with color consistency and slip resistance.
- Vacuum and wipe to eliminate dust, preventing imperfections and adhesion issues.
- Apply a primer or bonding agent if needed, to enhance adhesion and ensure even color distribution.
- Use appropriate cleaning products that are non-resinous and residue-free, ensuring no contaminants interfere with epoxy adhesion. Additionally, selecting the right cleaning agents helps maintain the surface’s cleanliness and prevents residue buildup that can compromise the finish. Proper cleaning and surface preparation also help minimize the risk of peeling and other defects. Ensuring the surface is free from microplastics in dust can further improve adhesion and longevity. Regularly inspecting the surface for contaminants during preparation can prevent overlooked residues from affecting the bond.
This prep work guarantees your epoxy will adhere properly, look smooth, and maintain slip resistance. Removing dust and roughening the surface are key to achieving a consistent finish and avoiding peeling. Proper preparation creates the ideal foundation for a durable, professional-looking epoxy coating.
Test and Confirm Your Floor Is Ready for Coating

Ensuring your floor is fully prepared before applying epoxy is essential for a successful finish. First, test the surface by pouring a small amount of water; if it beads up, your floor is ready. Confirm that the surface is smooth and dust-free, which helps with proper adhesion. During this process, check your tool calibration to ensure even application of the coating. When selecting your epoxy color, make sure it matches your vision and lighting conditions, as color can influence the final look. If you notice any issues, re-sand or clean the surface before proceeding. Double-check that your tools are calibrated to avoid uneven coating or streaks. Confirming these steps guarantees your floor is primed and ready for that flawless epoxy finish. Additionally, inspecting for surface moisture helps prevent future peeling or bubbling of the coating. Proper surface preparation is crucial to ensure the durability and longevity of your epoxy coating, especially considering the importance of adhesion in achieving a lasting finish. Paying attention to surface contamination can also significantly impact how well the epoxy bonds to the floor. Taking the time to verify moisture content can save you from costly repairs later on.
Frequently Asked Questions
How Long Should I Wait Before Applying the Epoxy After Prepping?
You should wait at least 24 hours after prepping before applying epoxy, but always check surface moisture testing results first. Verify the area has proper ventilation requirements to facilitate drying and curing. If moisture levels are high, extend the wait time and improve ventilation. Confirm the surface is completely dry, clean, and free of dust. This guarantees ideal adhesion and prevents peeling, ensuring a durable, long-lasting epoxy coating.
Can I Use Household Cleaning Products to Prepare the Floor?
You can use household cleaners to prepare your floor, but proceed cautiously. Carefully choose gentle, non-oily cleaners that eliminate surface residue without leaving a slippery or sticky film. Avoid harsh chemicals or those with oils, as they can interfere with epoxy adhesion. Properly rinsing and thoroughly drying the surface guarantees a clean, residue-free foundation. This simple step helps keep your coating secure, preventing peeling and promising a durable, flawless finish.
What Specific Tools Are Best for Sanding or Grinding the Surface?
You should use diamond blades and orbital sanders for sanding or grinding the surface. Diamond blades are perfect for cutting through tough concrete or old coatings efficiently. Orbital sanders help you smooth out the surface, removing debris and creating a uniform texture. Make certain to select the right grit and keep the tools well-maintained to achieve the best results. Proper tools ensure your prep work is thorough, leading to a durable epoxy finish.
How Do Humidity and Temperature Affect the Prep Process?
Humidity and temperature critically impact your prep process. High moisture levels can hinder proper adhesion, so you need to monitor humidity closely and make certain the surface is dry. Temperature control is essential; too cold or hot environments can affect how the epoxy bonds. Keep the area within the suggested temperature range, usually between 60-85°F, to promote ideal surface preparation, guaranteeing your coating adheres smoothly and lasts longer.
Is It Necessary to Wear Protective Gear During Surface Preparation?
Yes, you should wear protective gear during surface preparation to guarantee surface safety and protect yourself from dust, debris, and chemicals. Gloves, goggles, and a mask shield your skin, eyes, and lungs from potential hazards. Proper protective gear also helps prevent injuries from sharp tools or abrasive materials. Always prioritize safety to make the prep process effective and safe, reducing risks and ensuring a smooth epoxy coating application.
Conclusion
Remember, proper surface prep is the backbone of a lasting epoxy floor. Skipping steps is like building on quicksand — it’s bound to peel. Take your time to clean, fix, and smooth the surface, ensuring every detail is just right. When your floor is prepared with care, the epoxy will cling like a loyal friend, turning your space into a durable masterpiece. Prep smart, and your new floor will shine for years to come.