
To fix minor car paint scratches yourself, start by identifying your car’s exact color code and gathering quality touch-up kits with primers and clear coats. Clean and dry the area thoroughly, then lightly sand deep scratches if needed. Carefully apply matching paint in thin layers, finishing with a clear coat for protection and gloss. With patience and attention to detail, you can achieve a seamless repair—continue to learn tips to perfect your DIY approach.
Key Takeaways
- Identify your car’s color code and select the correct touch-up paint for seamless blending.
- Clean and dry the scratched area thoroughly before starting repairs.
- Lightly sand deeper scratches with fine-grit sandpaper to smooth the surface.
- Apply multiple thin coats of matching touch-up paint, allowing each to dry completely.
- Finish with a clear coat and gently buff the area for a polished, blended look.

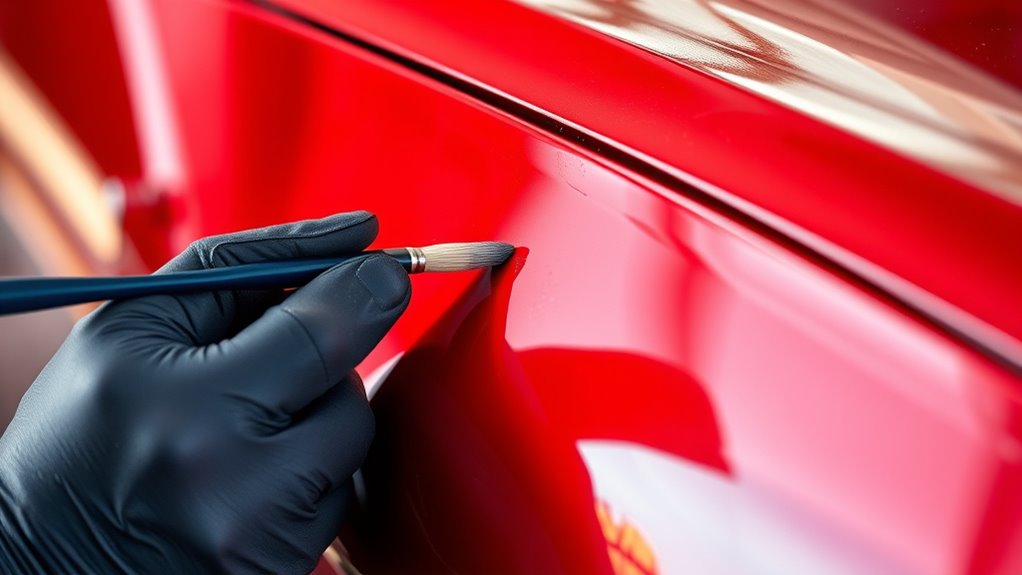
Minor car paint scratches can be frustrating, but you don’t always need a professional to fix them. With some simple tools and a little patience, you can handle minor scratches at home and save money. The key to a good repair is proper color matching. Before you start, identify your car’s exact color code, which is usually found on a sticker inside the driver’s door or in the owner’s manual. This ensures you select the right touch-up paint, making the repair blend seamlessly with your car’s original finish. When choosing your paint, opt for high-quality touch-up kits that include clear coats and primers, as these will give you a more durable and polished result.
Identify your car’s exact color code for seamless touch-up repairs.
To prevent scratches from worsening or creating new ones, practice scratch prevention techniques. Be cautious when washing your vehicle, using soft microfiber cloths or mitts, and avoid abrasive materials that can scratch the surface. Regularly applying a layer of wax or sealant also creates a protective barrier, making your car’s paint more resistant to minor abrasions. When parking, try to steer clear of tight spots or areas with overhanging branches that could scratch your paint. These preventive steps help maintain your car’s appearance and reduce the likelihood of needing further repairs.
Once you’ve gathered your materials, start by cleaning the scratched area thoroughly with soap and water, then dry it completely. Dirt and debris can cause additional scratches during the repair process. Lightly sand the scratch with very fine-grit sandpaper if the damage is deeper, but only if you’re confident in your skills—be cautious not to remove too much paint. Next, apply the matching touch-up paint carefully with a fine brush or applicator, following the manufacturer’s instructions. Use thin layers, allowing each coat to dry fully before adding the next. This gradual approach helps achieve a smooth, even finish that integrates well with the surrounding paint.
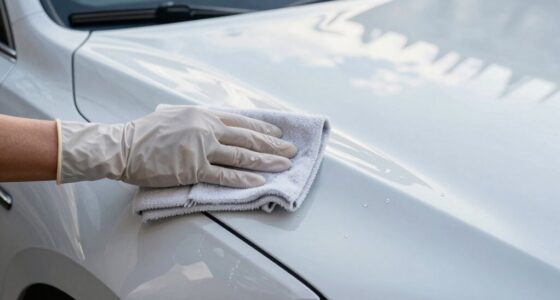
After the paint has dried, apply a clear coat to protect your repair and restore the glossy appearance. Once everything is dry, gently buff the area with a microfiber cloth to blend the repair with the rest of your car’s surface. Keep in mind that the success of DIY scratch fixes depends on your attention to detail and patience. If you follow proper techniques and focus on color matching, you’ll be able to restore your car’s look and extend the lifespan of its paint job, all while avoiding costly trips to the body shop. Additionally, understanding industry trends can help you stay informed about new products and techniques for car maintenance.

White Car Paint Touch Up Pen, Color Accurate Touch Up Paint for Cars, Professional Automotive Scratch Repair, Lasting Auto Scratch Remover, Fast Dry, Easy to Use, Safe and Washable, Versatile Use
Effective Car Scratch Remover – Our white car paint touch up pen, made with premium materials and advanced…
As an affiliate, we earn on qualifying purchases.
As an affiliate, we earn on qualifying purchases.
Frequently Asked Questions
Can Minor Scratches Be Fixed Without Professional Help?
Yes, you can fix minor scratches yourself. Start with simple touch-up paint to fill in the scratch, matching your car’s color. Use gentle sanding techniques around the area to smooth out the surface, but avoid over-sanding. Carefully apply multiple thin layers of touch-up paint, allowing each to dry. With patience and precision, you can improve your car’s appearance without professional help.
What Tools Are Essential for DIY Scratch Repair?
To fix minor scratches yourself, you need essential tools like a paint touch-up pen or small brush for precise application. Sanding techniques come in handy for smoothing out rough edges before applying paint. You should also have fine-grit sandpaper, rubbing alcohol for cleaning, and clear coat for finishing. These tools allow you to effectively repair scratches, ensuring a smooth, professional-looking result without needing to visit a shop.
How Long Does a DIY Scratch Repair Typically Last?
This scratch repair will last longer than you’d imagine—up to several years if done right! When you apply touch-up paint and a clear coat, you create a durable shield that withstands weather and washing. Proper prep and careful application are key. Typically, a well-done DIY fix can stay intact for 2-5 years, making your car look fresh and new longer than you’d expect from a simple DIY job.
Are There Risks of Worsening the Scratch During Repair?
When repairing scratches yourself, you risk worsening the damage if you’re not careful. If you apply too much product, you could thin the paint thickness, making the scratch look worse. Poor color matching might also stand out more. To avoid this, work gently, follow instructions precisely, and test on a small area first. This helps guarantee you don’t inadvertently deepen the scratch or create uneven coloration.
Can DIY Fixes Match the Original Car Paint Perfectly?
You might wonder if DIY fixes can match your car’s original paint perfectly. While skilled paint matching and color blending techniques can get close, achieving an exact match is challenging due to variations in paint batches and fading. Your best bet is to carefully select a matching color and blend it well to minimize differences. However, for flawless results, professional paint matching remains the most reliable option.

Rust-Oleum 2X Automotive Enamel Custom Spray 5-in-1 Spray Paint, 12 oz, Gloss Clear
DURABLE, FAST DRYING ACRYLIC FORMULA: Delivers a long-lasting, attractive finish on indoor and outdoor surfaces including metal, wood,…
As an affiliate, we earn on qualifying purchases.
As an affiliate, we earn on qualifying purchases.
Conclusion
Now that you’ve learned how to buff out those tiny scars on your car, think of your vehicle as a blank canvas, ready to shine again. With a little patience and the right tools, you’re like an artist restoring a masterpiece, bringing back its original luster. Each scratch you fix is like a tiny wound healing, leaving your car smooth and flawless, like a mirror reflecting your pride. Your ride is now ready to turn heads once more.

Kurhuxtn All Cars Magic Pen, 2 PACKS Magic Car Scratch Removal Pen, Car Scratch Remover, Efficient and Durable, Suitable for All Types of Scratch
【Easy Repair of Various Scratches】The Magic Car Scratch Removal Pen is designed specifically for repairing scratches on car…
As an affiliate, we earn on qualifying purchases.
As an affiliate, we earn on qualifying purchases.

USANOOKS Microfiber Cleaning Cloth Grey – 12 Pcs (12.5"x12.5") – High Performance – 1200 Washes, Ultra Absorbent Microfiber Towel Weave Grime & Liquid for Streak-Free Mirror Shine – Car Washing Cloth
10x GRIP-ROOT WEAVE – TRAP MORE, WORK LESS: Ultra-absorbent microfiber towels for car Grip Root weave works like…
As an affiliate, we earn on qualifying purchases.
As an affiliate, we earn on qualifying purchases.