Assemble a car emergency kit so you can respond to a breakdown, flat tire, minor injury, or unexpected delay. This beginner guide is for drivers who want a practical set of supplies for everyday trips and longer journeys. Allow 45-60 minutes to gather items, check your vehicle’s manual, and pack the kit.

Get business pricing on garage and car supplies
- Business-only prices and quantity discounts
- Tax-exempt purchasing
- Multiple users, one account, clear invoices

Everlit Survival Car Emergency Kit with Tire Inflator, First Aid Kit, Jumper Cables and Roadside Tools
- ✔ Tire inflator: 12V digital air compressor with auto-shutoff and LED light
- ✔ Jumper cables: 12 feet, 8 gauge, rated for 300 amps
- ✔ First aid kit: 108 pieces

AUTODECO Car Emergency Roadside Assistance Kit with Jumper Cables and Tire Inflator
- ✔ Brand: AUTODECO
- ✔ Kit description: 69-piece roadside kit
- ✔ Tire inflator: Included; power source and pressure capacity unspecified

Winter Car Emergency Kit with Jumper Cables and Detachable Snow Brush
- ✔ Snow brush length: 27 inches
- ✔ Snow brush design: Detachable brush with ice scraper
- ✔ Jumper cables: Included; length and wire gauge unspecified
Difficulty: Beginner | Time: 45-60 minutes
What You’ll Need
Tools & Materials:
- A sturdy, closable storage bin or bag that fits securely in your vehicle
- Reflective warning triangles or road flares permitted where you drive
- Reflective vest
- First aid kit
- Flashlight and spare batteries, or a charged hand-crank light
- Phone charging cable and a vehicle-compatible power bank or charger
- Jumper cables or a compatible jump starter
- Tire pressure gauge and vehicle-compatible tire inflator or sealant
- Basic tool kit and work gloves
- Drinking water and nonperishable snacks
Knowledge:
- How to find your vehicle’s spare tire, jack, and towing points in the owner’s manual
- Which tire size and battery type your vehicle uses
- Awareness of passenger needs, weather, and the types of roads you commonly travel
Check the owner’s manual before packing equipment for jump-starting or changing a tire. Some vehicles require specific connection points, tools, or procedures. Do not plan to use a jack or tire sealant until you have checked whether it is suitable for your vehicle.
Everlit Survival Car Emergency Kit with Tire Inflator, First Aid Kit, Jumper Cables and Roadside Tools
For drivers who want one kit to address several common roadside problems, Everlit offers the broadest documented coverage in this group. It combines a 12V digital inflator with auto-shutoff and an LED light, 12-foot, 8-gauge jumper cables rated for 300 amps, a 108-piece first aid kit, and items such as a warning triangle, tow rope, flashlight, and gloves. That range makes it more complete on paper than AUTODECO, whose 69-piece count does not identify the contents, and less season-specific than the winter kit.The auto-shutoff gives us a useful way to set a target pressure without continuously watching the inflator, while the LED may help when checking a tire in low light. Still, no inflation rate or other performance measurement is supplied, so we cannot judge how quickly it will handle a low tire. Its cables are described for standard vehicles, which is a meaningful boundary for buyers with larger or unusual vehicles. The mix of named tools and concrete specifications earns Everlit the top all-season position, but we should confirm that the cable rating suits our vehicle and supplement anything essential that is absent.
Pros:
- Combines roadside safety items with a 108-piece first aid kit
- 12V inflator has preset-pressure auto-shutoff and an LED light
- 12-foot, 8-gauge jumper cables have a stated 300-amp rating
- Includes named items such as a warning triangle, tow rope, flashlight, and gloves
Cons:
- Cable suitability is specified for standard vehicles
- No tire inflator performance measurements are provided
- The supplied description does not establish that it covers every roadside need
Best for: Drivers who want documented all-season basics, including first aid and safety gear alongside an inflator and jumper cables.
Not ideal for: Owners of vehicles that need higher-capacity jump leads, or buyers who need documented inflator performance before choosing.
Bottom line: We recommend Everlit for the broadest clearly described all-around package, provided its cable rating fits our vehicle.
“We recommend Everlit for the broadest clearly described all-around package, provided its cable rating fits our vehicle.”
AUTODECO Car Emergency Roadside Assistance Kit with Jumper Cables and Tire Inflator
AUTODECO makes the most sense when trunk space and a grab-and-go bag matter more than a fully itemized set of supplies. The package is listed at 5.3 pounds and measures 12.87 by 9.37 by 4.33 inches, giving buyers a concrete sense of its storage footprint. Jumper cables and a tire inflator are included, so it covers two familiar roadside problems in a package positioned for everyday driving, road trips, and camping.Its main weakness is uncertainty. The description calls this a 69-piece kit but does not spell out those pieces, and it omits the inflator’s power source and pressure capacity. That makes it harder to judge than Everlit, which specifies a 12V inflator and cable dimensions, and less reassuring for winter use than the cold-weather kit, which names its blankets, gloves, and snow brush. The cables are described as reinforced PVC and designed to resist freezing, cracking, and tangling, a helpful durability intention, but the supplied details do not give their length or rating. We would choose AUTODECO for compact storage only after checking the exact contents and compatibility for our car.
Pros:
- Includes both jumper cables and a tire inflator
- Compact storage bag is intended for trunk use
- Listed weight is 5.3 pounds and package dimensions are provided
- PVC cables are designed to resist freezing, cracking, and tangling
Cons:
- Inflator power source and pressure capacity are not specified
- The contents of the 69-piece kit are not detailed
- Jumper cable length and rating are not provided
Best for: Drivers seeking a stated compact, bagged kit for routine use who are willing to verify its detailed contents before depending on it.
Not ideal for: Buyers who need a specified inflator power source, pressure capacity, cable rating, or clearly itemized safety and first aid supplies.
Bottom line: We would choose AUTODECO for compact storage after confirming what the kit contains and whether its inflator and cables suit our car.
“We would choose AUTODECO for compact storage after confirming what the kit contains and whether its inflator and cables suit our car.”
Winter Car Emergency Kit with Jumper Cables and Detachable Snow Brush
Drivers who regularly face snow and ice may get more practical value from the Winter Car Emergency Kit’s dedicated clearing and warmth gear than from a general-purpose roadside bundle. Its 27-inch brush detaches for smaller areas and pairs with an ice scraper, while two emergency blankets and grip work gloves address cold exposure and handling tasks. Those are specific winter needs the Everlit lineup does not call out, and AUTODECO’s description does not establish that it includes any weather tools.That seasonal focus comes with a tradeoff: the kit lists jumper cables, but provides neither cable length nor wire gauge, so we have less information for judging whether they suit our vehicle than with Everlit’s specified leads. It also does not list an inflator or first aid kit, and storage bag dimensions are unavailable. A two-year warranty is stated, but warranty length alone cannot fill those equipment gaps. We see this as the right choice for snow-prone routes when clearing a vehicle and keeping basic cold-weather supplies close are priorities; for year-round coverage, Everlit is the more rounded pick.
Pros:
- Combines a snow brush and ice scraper with roadside essentials
- Detachable 27-inch brush can handle larger and smaller clearing areas
- Includes two emergency blankets and grip work gloves
- Includes a stated 2-year warranty
Cons:
- Jumper cable length and wire gauge are not specified
- No tire inflator or first aid kit is listed in the supplied details
- Storage bag dimensions are not provided
Best for: Drivers in snowy or icy regions who want vehicle-clearing tools, emergency blankets, and gloves in a portable kit.
Not ideal for: All-season buyers who want a specified tire inflator, detailed jumper cable ratings, or clearly listed first aid supplies.
Bottom line: We favor this kit for snow-prone driving, while Everlit is a stronger fit when all-season roadside breadth matters more.
“We favor this kit for snow-prone driving, while Everlit is a stronger fit when all-season roadside breadth matters more.”
As an Amazon Associate we earn from qualifying purchases.
Before You Start
Park in a safe place and gather supplies before packing. Keep the kit accessible without blocking the driver’s view, pedals, airbags, or access to seat belts. Secure heavy items so they cannot move during a sudden stop. Store water, batteries, medication, and other temperature-sensitive items with local heat and cold in mind; inspect them regularly and replace anything expired, damaged, or depleted.
Roadside equipment helps with visibility and basic problems, but it does not make a dangerous roadside location safe. If your vehicle stops near fast traffic, stay in the vehicle if exiting would put you in danger, use hazard lights, and call roadside assistance or emergency services as appropriate.
Step-by-Step Instructions
Step 1: Choose and secure a storage spot
Pick a closable bin or bag that fits in the trunk, cargo area, or another secure storage space. Group supplies in smaller pouches, such as safety, first aid, tools, and food. Place the kit where you can reach it without unloading heavy cargo, and secure it so it cannot slide or tip.
Tip:Keep items you may need before opening the vehicle, such as a reflective vest, easy to reach when that can be done safely.
Check: The kit stays in place during a firm push and can be reached without blocking vehicle controls or safety equipment.
Step 2: Pack roadside visibility and communication gear
Add a reflective vest, flashlight, spare batteries, phone cable, and a charged power bank or vehicle charger. Include reflective warning triangles or other legally permitted warning devices. Check that the light switches on and the charging equipment works with your phone.
Tip:Do not rely on a phone battery alone for emergency communication. Follow local rules for warning devices, and place them only when it is safe to do so.
Check: You can turn on the flashlight and confirm the phone charger fits and supplies power.
Step 3: Add equipment for common tire and battery problems
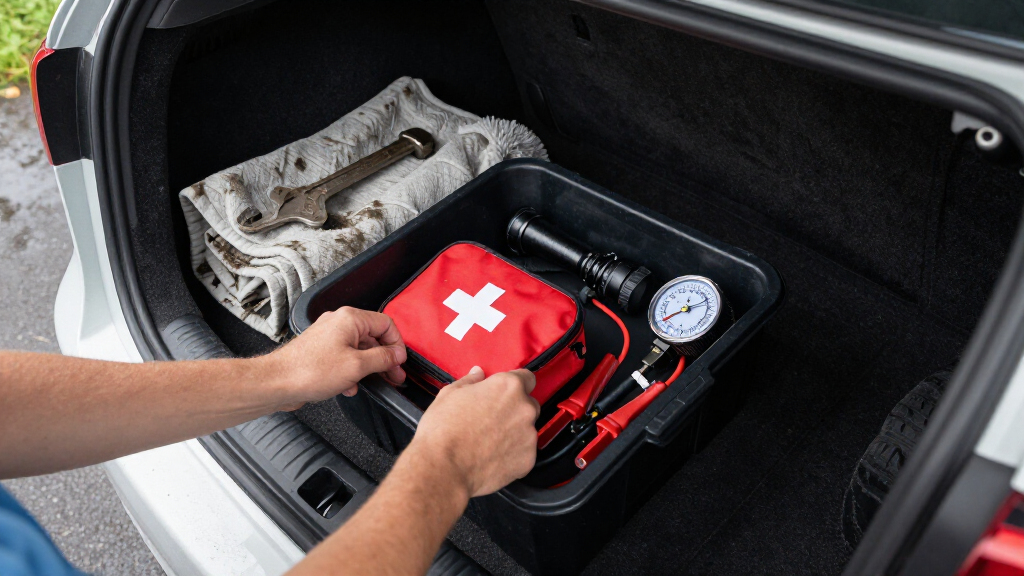
Pack a tire pressure gauge, a compatible inflator or sealant, and jumper cables or a jump starter suited to your vehicle. If your car has a spare tire, check that the spare is present and that the jack and lug wrench are the correct type. Store the owner’s manual or a copy of the relevant instructions with the kit.
Tip:Some vehicles have tire mobility kits instead of spare tires, and some tires or vehicle systems are not compatible with sealant. Check the manual and product instructions before use. A jump starter must match the vehicle and stay charged.
Check: The tire and battery equipment matches your vehicle, and you know where to find its instructions.
Step 4: Pack basic tools and protective supplies
Add work gloves, a small tool kit, duct tape, cable ties, and a sturdy multipurpose tool if you can use it safely and legally. Include a small towel or absorbent cloth. Keep sharp tools covered and store them so they cannot injure anyone in a collision.
Tip:Use roadside tools only for simple tasks you understand. Leave repairs near moving traffic, damaged electrical systems, or hot engine parts to trained assistance.
Check: Tools are present, secure, and easy to identify without unpacking every item.
Step 5: Prepare for minor injuries and personal needs
Pack a first aid kit with bandages, gauze, antiseptic wipes, disposable gloves, and any personal medical supplies you may need. Add drinking water, nonperishable snacks, tissues, and a blanket or weather-appropriate layer for each regular passenger. Include supplies for children, pets, or accessibility needs when relevant.
Tip:Keep prescription medicine in its proper packaging and follow its storage instructions. Do not leave temperature-sensitive medicine in a vehicle unless its label permits those conditions.
Check: The supplies cover the regular passengers and are within their expiry dates.
Step 6: Adapt the kit to your routes and weather
Add seasonal items based on where and when you drive. Cold-weather trips may call for warm clothing, a compact snow brush, an ice scraper, and traction material suitable for the vehicle and local conditions. Hot-weather or remote trips may call for extra water, sun protection, and additional snacks. Check that every item fits securely.
Tip:Some roads require specific equipment in certain seasons. Check local road rules and conditions before a long trip.
Check: The kit reflects the weather, passenger needs, and road conditions you are likely to encounter.
Step 7: Label the kit and set a check schedule
Label the container “Emergency Kit” and keep a short inventory inside the lid. Write down expiry dates and the next inspection month. Check the kit every few months and before long trips; replace used, expired, leaking, or damaged supplies and recharge electronic equipment.
Tip:Store water and snacks according to their packaging, and replace them sooner if heat, freezing, or damaged packaging may have affected them.
Check: The kit is labeled, its contents are accounted for, and a date is set for the next check.
Common Mistakes to Avoid
- Packing a jump starter, inflator, or tire sealant without checking vehicle compatibility. — Read the owner’s manual and product instructions, then match the equipment to the vehicle before storing it.
- Leaving the kit loose in the cabin or buried beneath heavy cargo. — Secure the container and choose an accessible storage location that does not obstruct controls, seat belts, or visibility.
- Forgetting that heat, cold, and time can make supplies unusable. — Record expiry dates, inspect the kit every few months, and check temperature-sensitive supplies more often.
- Assuming roadside work is safe wherever the car stops. — Put personal safety first. Use hazard lights and call for help if traffic, weather, terrain, or the vehicle’s position makes it unsafe to exit or work.
Troubleshooting
Problem: The emergency kit does not fit in the planned storage space.
Solution: Use a smaller bin, remove duplicate items, or divide the supplies between two secure locations. Keep safety and communication gear easy to reach.
Problem: The jump starter is discharged when you check it.
Solution: Recharge it according to its instructions and set a recurring reminder to inspect its charge. If it will not hold a charge, replace it with a compatible unit.
Problem: The tire inflator or sealant does not match the vehicle.
Solution: Check the tire and vehicle manuals for approved repair methods. Buy compatible equipment, or rely on roadside assistance instead of using unsuitable products.
Problem: Food, water, or first aid items have expired or been damaged by storage conditions.
Solution: Replace them, follow package storage guidance, and shorten the inspection interval if the vehicle is exposed to strong heat or freezing conditions.
What Success Looks Like
Your kit is complete when it is secured in the vehicle, contains working visibility and communication gear, compatible tire and battery equipment, basic tools, first aid supplies, and provisions suited to your passengers and routes. You should be able to find the kit quickly, identify each item, and confirm that the owner’s manual explains how to use vehicle-specific equipment.
Next Steps
Place a reminder on your calendar to inspect the kit every few months and before long drives. Recharge the jump starter and power bank, replace used or expired supplies, and adjust seasonal items when weather changes. If you travel with a new passenger, pet, or medical need, update the kit before your next trip.
Frequently Asked Questions
Do I need jumper cables or a jump starter?
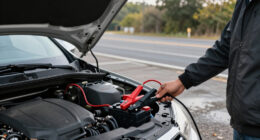
Either can help with a dead battery if the equipment and procedure suit your vehicle. A jump starter works without a second vehicle but needs charging. Jumper cables require another vehicle and correct connection points. Check the owner’s manual before using either method.
Should I keep a spare tire in the kit?
If your vehicle came with a spare, check that it is present and that you also have the correct jack and lug wrench. Some vehicles have a tire mobility kit or no spare, so follow the vehicle manual and check the condition and pressure of any spare you carry.
How often should I check my car emergency kit?
Inspect it every few months and before long trips. Check expiry dates, packaging, water and food, flashlight batteries, and the charge on electronic devices. Inspect more often if the vehicle experiences very hot or cold conditions.
What should I do if my car breaks down beside traffic?
Turn on the hazard lights and assess whether it is safe to exit. If leaving the vehicle would put you near fast traffic or another hazard, stay inside with seat belts fastened and call roadside assistance or emergency services. Use warning devices only when you can place them safely and in line with local rules.
Halloween Picks
halloween
As an affiliate, we earn on qualifying purchases.