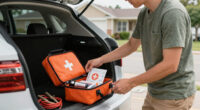
This guide will show you how to put together a reliable car emergency kit designed to keep you safe during roadside breakdowns or emergencies. Suitable for all drivers, especially beginners, this kit helps you handle common issues like flat tires, overheating, or minor injuries. Completing this task ensures you’re prepared for unexpected situations and can provide or receive assistance efficiently.
Difficulty: Beginner | Time: 30-60 minutes
What You’ll Need
Tools & Materials:
- None
Knowledge:
- Basic understanding of vehicle needs and safety procedures
Gather your vehicle’s manual if available, and set aside a clean, accessible space in your trunk or storage area to assemble the kit.
Everlit Survival Car Emergency Kit, Roadside Safety Tool Kit with Gloves,Digital Auto Air Compressor Tire Inflator, First Aid Kit, 12 Feet Jumper Cable, Tow Strap, Flashlight for Women, Men, Teenagers
The Road Guardian- The portable roadside assistance kit is designed and hand picked by a group of experienced…
As an affiliate, we earn on qualifying purchases.
As an affiliate, we earn on qualifying purchases.
Before You Start
Check your vehicle’s specifications for any specific needs or restrictions. Confirm that you have enough space in your vehicle for the kit components. If your vehicle is older or has special requirements, consider additional items specific to your model.
Everlit Survival Car Emergency Kit, Roadside Safety Tool Kit with Gloves,Digital Auto Air Compressor Tire Inflator, First Aid Kit, 12 Feet Jumper Cable, Tow Strap, Flashlight for Women, Men, Teenagers
The Road Guardian- The portable roadside assistance kit is designed and hand picked by a group of experienced…
As an affiliate, we earn on qualifying purchases.
As an affiliate, we earn on qualifying purchases.
Step-by-Step Instructions
Step 1: Gather essential items for the kit
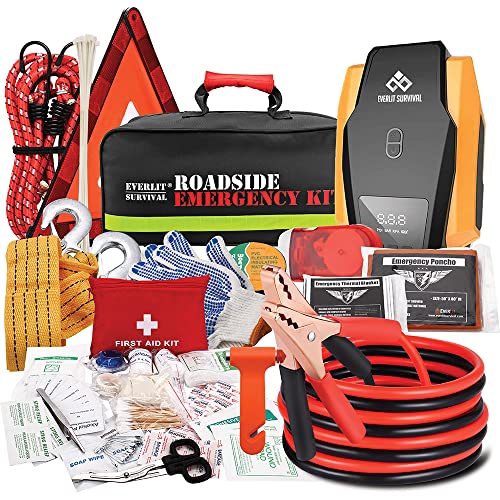
Collect items such as a first aid kit, flashlight with extra batteries, jumper cables, basic tools (screwdriver, pliers), a tire pressure gauge, a portable air compressor, reflective warning triangles or flares, bottled water, non-perishable snacks, a blanket, and a fire extinguisher.
Tip: Use a sturdy storage container or a dedicated backpack to keep items organized and portable.
Check: All items are present, in good condition, and stored securely in your container.
Step 2: Check and top off vehicle fluids
Inspect your engine oil, coolant, windshield washer fluid, and brake fluid levels. Refill or top off as needed using the appropriate fluids for your vehicle.
Tip: Consult your vehicle manual for specific fluid types and safe refill procedures.
Check: Fluid levels are within recommended ranges; no leaks or damage are visible.
Step 3: Ensure tires are properly inflated
Use a tire pressure gauge to check each tire, including the spare. Inflate tires to the recommended PSI listed in your vehicle manual or on the driver’s door placard.
Tip: Check tire pressure when tires are cold for accurate readings.
Check: All tires are inflated to the correct pressure, and the spare is ready for use.
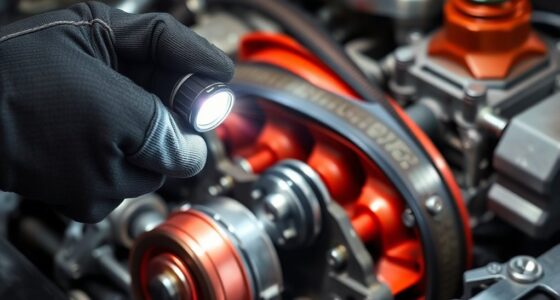
Step 4: Test safety items and tools
Verify that the flashlight works, batteries are fresh, the fire extinguisher is charged, and the warning triangles or flares are undamaged and accessible.
Tip: Replace batteries and fire extinguisher charge as needed annually.
Check: All safety items are functional, easily accessible, and ready for emergency use.
Step 5: Organize and store the kit in your vehicle
Place all items securely in your storage container or designated compartment in your car. Make sure nothing can move around or cause noise while driving.
Tip: Label compartments or use color-coded bags for easy access during emergencies.
Check: Kit is organized, accessible, and safely stored in your vehicle.

Mini First Aid Kit – 150 Piece Small Waterproof Hard Shell Medical Kit for Home, Car, Travel, Camping, Truck, Hiking, Sports, Office, Vehicle & Outdoor Emergencies- Small First Aid Medical Kit (Red)
ESSENTIALS FOR EMERGENCY: Everything you need is in this first aid kit! Our kit includes over 150 professional-grade…
As an affiliate, we earn on qualifying purchases.
As an affiliate, we earn on qualifying purchases.
Common Mistakes to Avoid
- Overloading the kit with unnecessary items — Include only practical, essential items to keep the kit manageable and space-efficient.
- Neglecting to check or maintain items regularly — Set a schedule to review and update your kit every six months or after long trips.
- Failing to verify the functioning of safety equipment — Test flashlights, batteries, and fire extinguishers periodically to ensure they work when needed.
- Storing the kit improperly or in an inaccessible place — Keep your kit in an easily reachable location, such as the trunk or under a seat.

142 PCS Emergency Roadside Kit for Car ,Safety Car Kit with Jumper Cables
【Things you may need】: This roadside assistance packages is a perfect gift.Contain the necessary roadside kits, snow shovel,…
As an affiliate, we earn on qualifying purchases.
As an affiliate, we earn on qualifying purchases.
Troubleshooting
Problem: The fire extinguisher is expired or not working
Solution: Replace or service the fire extinguisher and check the expiration date annually.
Problem: The flashlight does not turn on
Solution: Replace batteries and test the flashlight regularly; keep spare batteries in your kit.
Problem: Tire pressure cannot be stabilized
Solution: Inspect for leaks or damage; replace the tire if necessary or seek professional help.
Problem: You run out of water or snacks during a trip
Solution: Restock your supplies regularly, especially before long journeys.
What Success Looks Like
The kit contains all essential items in good condition, organized securely. Vehicle fluids are topped up, tires are correctly inflated, safety equipment functions, and the kit is stored accessibly. You can confidently handle common roadside emergencies with these preparations.
Next Steps
Regularly review and update your kit, especially after use or changes in vehicle needs. Practice using safety equipment like the fire extinguisher and jumper cables. Keep a record of expiration dates and replace supplies as needed. Consider adding seasonal items, such as snow chains or extra blankets for winter.
Frequently Asked Questions
How often should I check my emergency kit?
Review your kit every six months and before long trips to ensure all items are present, functional, and up-to-date.
What should I do if my tire is flat?
Use your spare tire and jack to replace the flat, then inspect your damaged tire or seek professional repair. Ensure your spare is inflated and ready before travel.
Can I add personal items to my emergency kit?
Yes, include personal essentials like medications, phone chargers, or extra clothing, but keep the kit organized and manageable.
What safety items are optional but recommended?
Items such as an emergency blanket, work gloves, or a multi-tool can be helpful but are not mandatory. Prioritize basic safety and communication tools.