Using simple DIY headlight restoration kits is an easy and cost-effective way to restore clarity and improve your vehicle’s brightness. These kits typically include abrasive pads, cleaning solutions, polish, and UV sealants. You start by cleaning your headlights, then sand away the oxidation, polish for clarity, and finish with a protective coat. With patience and following instructions, you can quickly see a noticeable difference. Keep going to discover tips for perfect results and longer-lasting headlights.
Key Takeaways
- Clean the headlight surface thoroughly before starting the restoration process.
- Use the included sandpaper or abrasive pads to remove oxidation and cloudiness.
- Apply the polishing compound to restore clarity and improve lens transparency.
- Seal the headlight with the UV-protective clear coat for long-lasting results.
- Follow the kit instructions carefully and take your time for optimal and safe restoration.
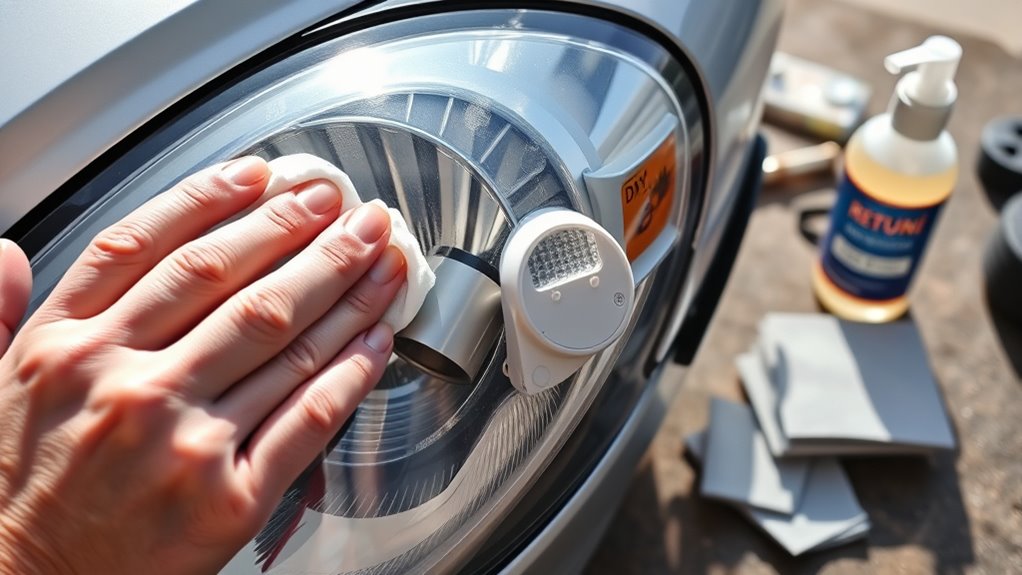
Have your headlights become cloudy or foggy? If so, you’re not alone. Over time, exposure to sunlight, dirt, and road debris causes the plastic lens to degrade, leading to a dull, hazy appearance that diminishes your vehicle’s brightness and safety. Fortunately, restoring those headlights is a straightforward process you can do yourself using simple kits. These kits are designed to remove the oxidation and restore lens clarity, making your headlights look almost new again.
Cloudy headlights? Restore clarity easily with simple DIY kits that remove oxidation and bring back their original shine.
One of the key features of effective headlight restoration kits is their ability to provide UV protection. UV rays from the sun break down the plastic over time, causing discoloration and yellowing. A good kit includes a protective sealant that forms a barrier against future UV damage, helping your headlights stay clearer longer. When you follow the instructions, applying this UV protection is vital—it ensures the restored clarity lasts and prevents the headlights from yellowing prematurely. This step is especially important if you frequently park outside or drive in sunny climates.
Using a DIY headlight restoration kit is simple and inexpensive. Typically, these kits come with sandpaper or abrasive pads, a cleaning solution, a polishing compound, and a sealant. You start by cleaning the headlight surface thoroughly to remove dirt and grime. Next, you sand the lens with the provided abrasive to strip away the cloudy, oxidized layer. The process is quick, and you’ll notice the lens becoming more transparent as you work. Once the surface is smooth and clear, you apply the polishing compound to refine the lens and enhance clarity. This step restores the lens’s original transparency, boosting your headlights’ overall brightness.
The final step involves sealing the surface with a UV-protective clear coat. This sealant not only enhances lens clarity but also shields against future UV damage and environmental factors. When you finish, your headlights will look noticeably brighter and clearer, improving your visibility and the overall look of your vehicle. Plus, doing this yourself saves money compared to professional restorations. Just remember to follow the kit instructions carefully—patience and thoroughness are key.
In just a few hours, your headlights can go from dull and foggy to clear and bright. Regular maintenance using these simple kits can extend the life of your headlights, keeping them looking great and functioning safely. With a little effort and the right tools, you can easily restore your headlights, guaranteeing you see better and that your car stands out on the road for all the right reasons. Additionally, the integration of robotics in logistics and automation technology in manufacturing processes can help improve the quality and efficiency of headlight production, ensuring better materials and coatings for longer-lasting clarity.
Frequently Asked Questions
How Long Does a Headlight Restoration Last?
A headlight restoration typically lasts between 1 to 3 years, depending on UV protection and your driving conditions. Using a kit with UV protection helps extend the lifespan durability of your restored headlights by preventing yellowing and cloudiness caused by sun exposure. To maximize longevity, regularly clean and apply a protective sealant. Proper maintenance guarantees your headlights stay clear and effective longer, saving you time and money on future restorations.
Are DIY Kits Safe for All Car Models?
You might find it surprising, but DIY kits are generally safe for most car models, especially when you check compatibility first. Many kits include safety features that prevent damage, making them versatile. However, it’s smart to review your car’s specific model requirements and instructions. If you’re cautious and follow the guidelines, you can confidently restore your headlights without worrying about compatibility or safety issues.
Can I Restore Yellowed Headlights Without Polishing?
Yes, you can restore headlight clarity without polishing by using a restoration kit that focuses on cleaning and sealing. These kits often include a clarifying solution and a protective sealant, which improve the headlight’s appearance and durability without needing polishing. Follow the restoration process carefully, applying the solutions evenly and allowing proper drying time, to achieve clear, bright headlights without the extra step of polishing.
What Are the Signs of Ineffective Headlight Restoration?
You’ll notice ineffective headlight restoration if your headlights still look cloudy or yellowed after treatment. UV damage and surface oxidation often cause this, and if the haze persists or worsens over time, it’s a sign your restoration didn’t fully address these issues. Proper cleaning, polishing, and sealing are essential. If the surface remains dull or oxidized, it indicates the restoration wasn’t successful, and you may need to redo the process.
Is Professional Restoration More Effective Than DIY Kits?
Professional restoration is generally more effective than DIY kits, especially since studies show it can last up to four times longer. While DIY kits are cost-effective and require minimal skill, they often provide only temporary results. If you want a long-lasting, high-quality fix, investing in professional services is worth it. The cost comparison favors DIY initially, but skills requirements and durability make professionals the better choice for lasting clarity.
Conclusion
Now that you’ve learned how easy it is to restore your headlights with simple kits, imagine the boost in your car’s appearance and safety. But don’t stop here—what other DIY repairs could you master next? Just think of the satisfaction waiting for you when you tackle each project yourself. The best part? You’re only a kit away from making your vehicle look brand new again. Ready to see what’s next? The possibilities are endless.