
To avoid wiring harness mistakes during a head unit upgrade, choose the right harness compatible with your vehicle and head unit. Understand your vehicle’s wiring color codes for power, ground, and speakers. Double-check all connections, use proper connectors, and make certain secure grounding to prevent noise and shorts. Test everything before finalizing. Proper organization and verification reduce issues later. Keep these tips in mind, and you’ll ensure a safe, reliable installation—more insights follow if you keep going.
Key Takeaways
- Always verify harness compatibility with your vehicle and head unit before installation.
- Follow color-coded wiring diagrams and avoid guessing to prevent incorrect connections.
- Ensure proper grounding using clean, unpainted metal spots and secure, insulated connections.
- Use quality connectors and adapters suited for your vehicle to maintain reliable and safe wiring.
- Test all connections with a multimeter or test light to confirm power, ground, and signal integrity before finalizing.

Scosche FD16B Stereo Wiring Harness Compatible with Select Non-Amplified 1998-2011 Ford, Lincoln, Mazda, Mercury and Nissan Vehicles – Car Stereo Harness – Check Vehicle List in Images for Your Model
Convenient Solution – Scosche FD16B Radio Installation Harness allows a new aftermarket radio to be installed in select…
As an affiliate, we earn on qualifying purchases.
As an affiliate, we earn on qualifying purchases.
Why Choosing the Correct Wiring Harness Matters
Choosing the right wiring harness is essential because it guarantees your head unit connects properly to your vehicle’s electrical system. Proper wire color coding makes installation straightforward, helping you identify and match wires quickly. If the harness isn’t compatible with your vehicle, it can lead to connection issues or even damage your audio system. Ensuring harness compatibility means selecting one designed specifically for your car’s make and model, which prevents headaches later on. Using an incompatible harness might cause incorrect wiring, resulting in malfunctioning features or electrical faults. When you focus on wire color coding and verify harness compatibility, you reduce the risk of mistakes and ensure a seamless upgrade. Additionally, understanding the importance of wiring harness specifications can prevent costly errors during installation. Paying attention to installation techniques and following proper procedures is equally important for a reliable connection. Being aware of electrical system requirements can further help you avoid potential damage and ensure optimal performance from your head unit. This careful approach saves time and helps your new head unit perform reliably from the start.
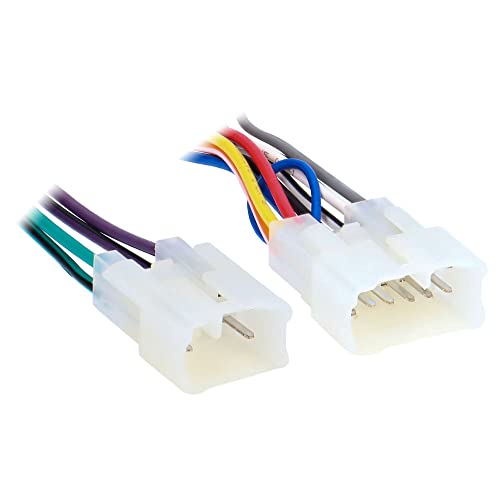
Metra 70-1761 Radio Wiring Harness Fits Select 1987-UP Toyota Vehicles Power + 4 Speaker (Packaging May Vary)
Plugs Into Car Harness At Radio
As an affiliate, we earn on qualifying purchases.
As an affiliate, we earn on qualifying purchases.
How to Understand Your Vehicle’s Wiring Basics
Ever wonder how your vehicle’s wiring system works? Understanding the basics starts with knowing wire color codes, which indicate their functions—like power, ground, or speaker connections. These color codes vary by manufacturer, so checking your vehicle’s service manual helps clarify which wire does what. Additionally, knowing voltage requirements is vital; most head units operate on 12 volts, but some components need specific power levels to function properly. Use a multimeter to verify voltage and avoid damaging your new head unit. Recognizing these fundamentals ensures you connect wires correctly, preventing shorts or equipment failure. Familiarity with wire color codes and voltage needs forms the foundation for a safe, effective upgrade, keeping your installation smooth and avoiding common wiring mishaps. Properly identifying your vehicle’s wiring harness configuration can also simplify the process and prevent costly errors. Being aware of electrical load capacities ensures your system handles the power demands without overloads or damage. Additionally, understanding proper grounding techniques can significantly improve system stability and safety during installation. For optimal results, always refer to your vehicle’s wiring diagrams and installation guides to ensure all connections are correct and secure. To further ensure safety and reliability, consulting conversion tools can help verify your wiring setup against standard measurements.

TARAMPS VTS5.1 Automotive Digital Voltmeter and Sequencer VTS 5.1 Blue LED Automotive Car Audio 5 Sequencer Outputs SPL Mode Voltage Protection, Digital Display, Car Audio Monitor, Black
All functions are accessed by pressing the FCN key, sequentially.
As an affiliate, we earn on qualifying purchases.
As an affiliate, we earn on qualifying purchases.
Common Wiring Mistakes to Avoid During Head Unit Installation
Are you aware of the common wiring mistakes that can derail your head unit installation? One major error is ignoring proper color coding. Using the wrong wires or mismatched colors can cause confusion and lead to faulty connections. Always verify your vehicle’s wiring color codes before connecting. Additionally, pay close attention to wiring insulation. Damaged or exposed insulation can cause shorts or signal interference, so ensure all wires are properly insulated and secure. Rushing the process or twisting wires without proper connectors can also lead to unreliable connections. Take your time to follow the wiring diagrams carefully, double-check your work, and avoid cutting corners. Properly managing color coding and wiring insulation helps ensure a safe, functional, and long-lasting installation. Understanding wire gauge and capacity is also crucial to prevent overheating or electrical failures in your setup. Being aware of the appropriate tools needed can make the process smoother and prevent accidental damage. Always remember that heat buildup and fumes from improper wiring can pose safety hazards, so adhere to best practices to maintain safety. Additionally, familiarizing yourself with vehicle wiring diagrams can significantly reduce errors during installation. To further improve your setup, consider learning about connector types and secure fittings to ensure stable connections.

Feggizuli 280PCS Crimp Connectors, 2.8mm 4.8mm 6.3mm Male and Female Spade Connector kit, 15 Types Crimp Terminals Electrical Connectors, Electrical Terminals Includes Spade Ring Fork Wire Connectors
[Quick Connection] Just prepare a crimper, then you can crimp the connectors and connect the wire in a…
As an affiliate, we earn on qualifying purchases.
As an affiliate, we earn on qualifying purchases.
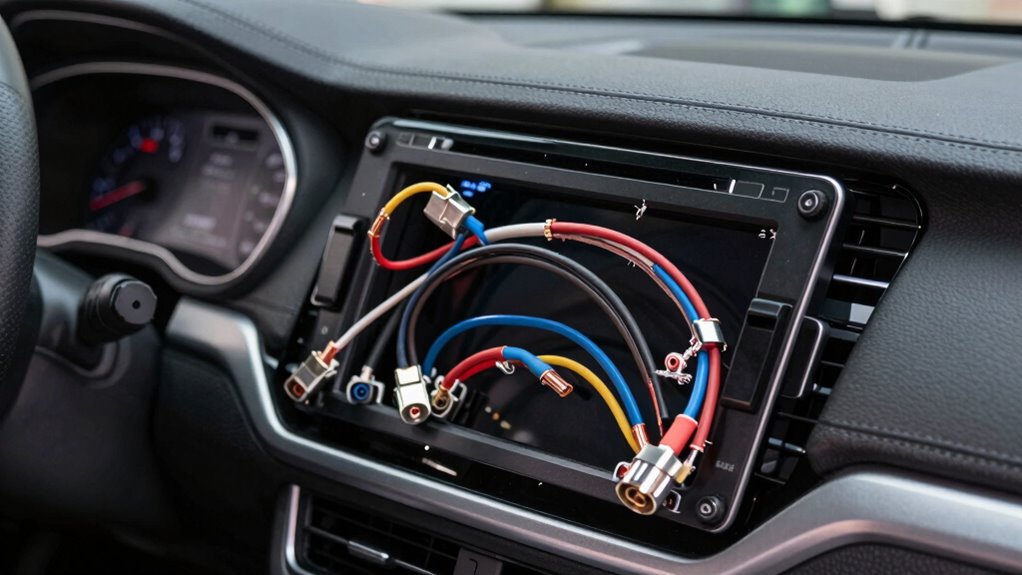
Are You Using the Right Adapters and Connectors?
Make sure you check that your adapters and connectors match your head unit and vehicle’s wiring. Using incompatible or incorrect connectors can cause connection issues or damage. Always verify compatibility and choose the right connector types for a smooth upgrade. Paying attention to bedding compatibility can also ensure a more comfortable and secure connection throughout your vehicle. Additionally, understanding the electrical requirements of your system can prevent potential malfunctions. Being aware of power ratings can help avoid overloads and ensure optimal performance. Recognizing signal compatibility is essential to maintain proper audio and data transmission quality. Moreover, consulting installation guidelines can help you avoid common wiring mistakes and ensure a safe, reliable connection.
Compatibility Checks Are Crucial
Ensuring you have the right adapters and connectors is essential for a smooth head unit upgrade. Compatibility checks prevent wiring issues and guarantee your new system functions correctly. Start by verifying wire harness compatibility with your vehicle’s wiring standards, which can vary across makes and models. Using incompatible harnesses can lead to poor connections, audio problems, or even damage to your vehicle’s electronics. Always double-check the specifications of adapters and connectors before purchasing. If you’re uncertain, consult your vehicle’s manual or seek advice from professionals. Proper compatibility guarantees a straightforward installation and reliable performance, saving you time and money. Don’t overlook this step—skipping it can cause headaches down the line, undermining your upgrade’s success.
Proper Connector Types Matter
Using the correct connector types is essential to a successful head unit upgrade. Proper connector compatibility guarantees a secure connection and prevents future issues. Using incompatible connectors can lead to wiring errors, risking damage or poor performance. Always verify that your adapters match your vehicle’s wiring harness and head unit ports.
| Connector Type | Purpose |
|---|---|
| OEM Connectors | Original, designed for your vehicle model |
| Aftermarket Adapters | Facilitate compatibility with new head units |
| Wiring Harnesses | Ensure wiring precision and reliable connections |
Choosing the right connectors promotes wiring precision, reducing the chance of mistakes. Double-check compatibility before purchasing, and avoid makeshift connections that might compromise your upgrade’s integrity.
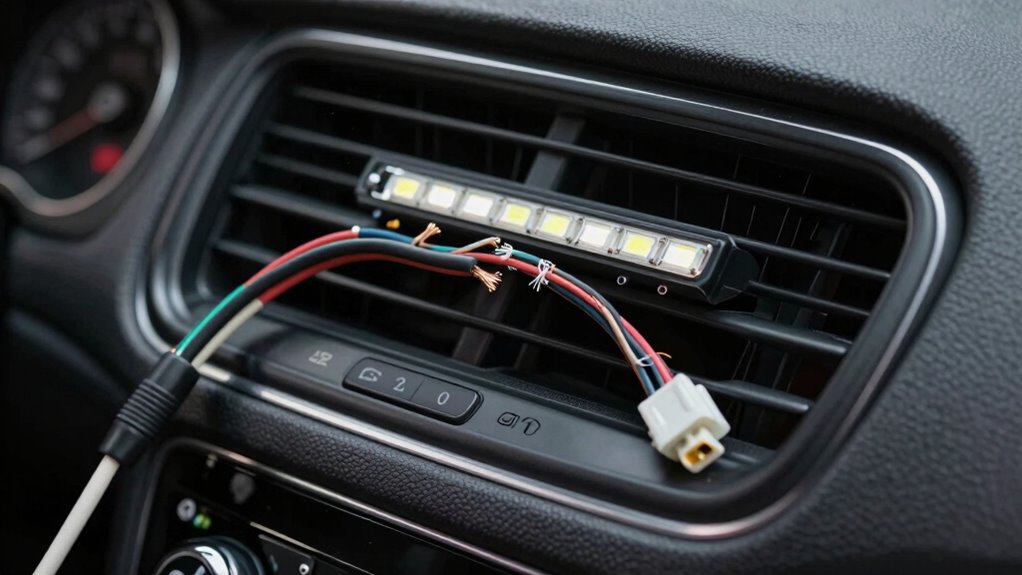
How to Properly Ground and Connect Signal Wires

Ever wonder what it takes to get a clean, reliable connection when wiring your head unit? It starts with proper grounding techniques and secure signal wiring. First, choose a solid, unpainted metal spot on your vehicle’s chassis for grounding. Use a ring terminal and ensure the connection is tight and free of paint, rust, or debris. This proper grounding reduces electrical noise and interference. When connecting signal wires, keep them short and away from power cables to prevent noise pickup. Use quality connectors and color-code your wires for easy identification. Make sure all connections are tight and insulated to avoid shorts. Proper grounding and signal wiring are vital for clear audio and system stability, so take your time to do it right the first time. Incorporating professional equipment can also improve overall connection quality. Additionally, understanding Floating on Water concepts can help you troubleshoot issues related to electrical interference. Being aware of electrical noise and how it impacts signal integrity is crucial for optimal system performance.
Double-Check Your Wiring With the Right Diagrams and Tests
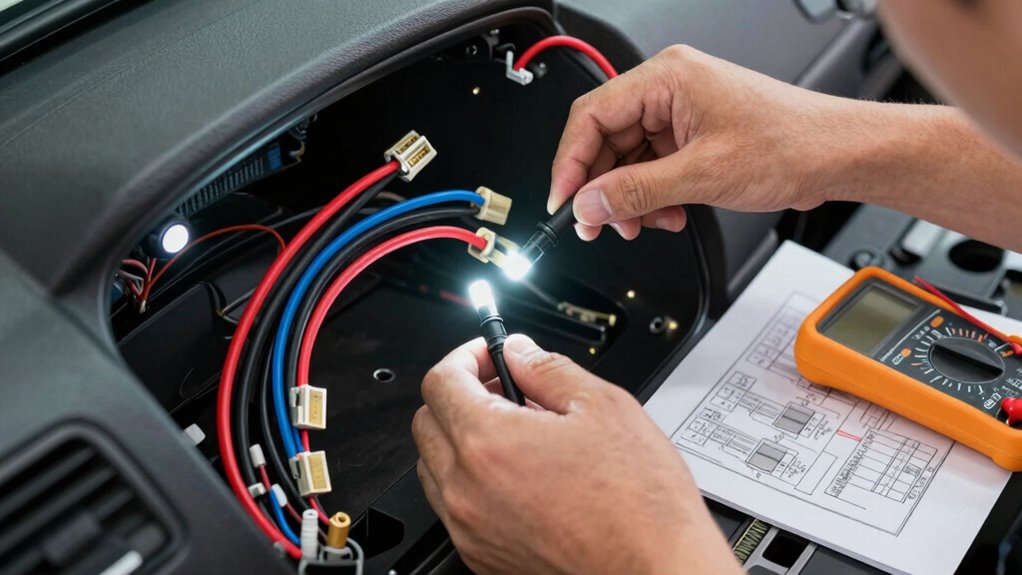
Before you finish your installation, it’s vital to double-check your wiring with the correct diagrams and testing methods. Use color coding charts to verify each wire’s purpose, guaranteeing you’ve matched the right signals to the right connections. When inspecting your wiring, double-check that you’ve properly stripped the wires—exposing enough copper without damaging the insulation—to confirm solid connections. Refer to manufacturer diagrams to confirm your wiring matches the vehicle’s wiring harness and head unit specifications. Use a multimeter or test light to verify power, ground, and signal wires are functioning correctly. Taking these steps helps prevent issues like short circuits or incorrect audio signals, saving you headaches later. Accurate wiring verification is an essential step toward a safe, reliable head unit upgrade.
Test Your System Before Finalizing the Installation

Before you finish installing your head unit, make sure to test everything thoroughly. Check that all systems work properly, wiring connections are secure, and the audio quality meets your expectations. Doing this guarantees your upgrade performs perfectly before you complete the final steps.
Check System Functionality
Once you’ve completed the installation, it’s essential to verify your system thoroughly to guarantee everything functions correctly. Start by powering on your head unit and checking basic functions. Then, follow these steps:
- Confirm the wiring color matches the wiring diagram and that each wire connects to the correct component.
- Check connector polarity to make sure positive and negative connections are correct, preventing audio or electrical issues.
- Test all audio sources—radio, Bluetooth, aux—to confirm signals are clear and functioning properly.
If any feature doesn’t work or there’s static, re-examine your wiring connections and connector polarity. Ensuring these elements are correct helps avoid problems before finalizing your installation.
Verify Wiring Connections
To guarantee your head unit operates correctly, you need to verify that all wiring connections are secure and correctly matched. Start by double-checking wire color coding to ensure each wire connects to the proper component. Use the vehicle’s wiring diagram or manufacturer’s guide to confirm the correct wire color matches. Next, inspect connector pinouts to verify that each connector is properly seated and that pins are not bent or damaged. Ensuring proper connections prevents issues like shorts or signal loss. Carefully recheck all connections before powering on the system. This step helps catch any mistakes early, saving you time and potential damage down the line. Once confirmed, you can confidently proceed to testing your head unit’s functionality.
Test Audio Quality
After verifying all wiring connections are secure and correctly matched, it’s time to test the audio quality of your system. Start by playing a familiar song to evaluate clarity and balance. Focus on these key areas:
- Check wireless connectivity to confirm your device pairs seamlessly with the head unit.
- Listen for consistent sound across all speakers, adjusting sound equalization settings for ideal balance.
- Test different audio sources, like Bluetooth streaming or USB, to verify each functions properly.
Make sure the sound is clear, without distortion or dead spots. Fine-tune the equalization to suit your preferences, and verify wireless connections remain stable during playback. This step ensures your upgraded head unit delivers the best audio experience before you finalize the installation.
Tips for a Safe and Reliable Wiring Harness Setup
Ensuring your wiring harness is set up safely and reliably is essential for a successful head unit upgrade. Start by double-checking all connections, making sure wires are secure and properly insulated to prevent shorts or signal issues. If your goal includes wireless integration, verify that your harness supports it without interference, and avoid unnecessary wiring clutter that can hinder signal quality. Aesthetic considerations matter too; neatly bundle wires and use color-coded connectors to keep everything organized and visually clean. Avoid rushing the process—take your time to guarantee each connection is tight and correct. Proper setup reduces the risk of malfunctions down the road, enhances overall safety, and creates a clean, professional-looking installation that’s both functional and attractive.
Frequently Asked Questions
Can I Upgrade My Head Unit Without Professional Wiring Skills?
You can attempt a DIY installation if you’re comfortable with basic wiring, but it’s essential to understand wiring compatibility to avoid issues. Without professional skills, you might struggle with connecting the wiring harness correctly, which could lead to problems like audio loss or electrical damage. If you’re unsure, consider seeking help or carefully following detailed guides to guarantee a smooth upgrade, preventing costly mistakes.
What Tools Are Essential for Wiring Harness Installation?
You’ll need essential tools like wire strippers to remove insulation cleanly and connector crimpers to secure connections properly. These tools guarantee your wiring harness installation is safe and reliable. Use wire strippers to prepare each wire, then employ connector crimpers to attach the appropriate connectors firmly. Having these tools handy makes the process smoother and helps prevent common wiring mistakes, even if you’re not a professional.
How Do I Identify the Correct Wiring Harness for My Vehicle?
Think of choosing a wiring harness like finding the right key for a lock—your vehicle’s compatibility is everything. To identify the correct wiring harness, check your vehicle’s make, model, and year, then compare these details to wiring harness types designed specifically for your car. Look for labels or consult a wiring diagram to guarantee compatibility; using the wrong harness can be like trying to fit a square peg in a round hole.
Are Aftermarket Wiring Harnesses Compatible With All Head Units?
Aftermarket wiring harnesses are not compatible with all head units, so you need to check for factory compatibility first. Many aftermarket options are designed to fit specific vehicle makes and models, ensuring a proper connection. Always verify that the harness matches your head unit’s requirements and your vehicle’s factory wiring. Doing so helps prevent wiring mishaps and ensures a seamless upgrade process.
What Signs Indicate a Faulty Wiring Connection After Installation?
You’ll notice signs of a faulty wiring connection if your head unit’s sound cuts out, static appears, or the display flickers. Check for wiring corrosion or loose connections, as these are common culprits. If wires are corroded or connections aren’t secure, it can cause audio issues or intermittent power. Make sure all connections are tight and clean, and replace any corroded wiring to guarantee your head unit functions properly.
Conclusion
Getting your head unit upgrade right isn’t just a small task—it’s the secret to transforming your driving experience into something epic. Avoid wiring mistakes that can turn your project into a nightmare, and follow these tips to guarantee a safe, reliable setup. With the right wiring, your new system will perform like a symphony, blowing away your old setup. So, double-check everything, stay patient, and enjoy the incredible sound adventure you’ve just opened!