
To get thick foam without wasting soap, start by adjusting your foam cannon’s nozzle for ideal atomization and coverage. Fine-tune the water pressure to prevent bubbles from breaking, and customize the soap-to-water ratio so the foam is dense but not overly diluted. Regularly clean and calibrate your equipment to maintain performance. Keep experimenting with these settings, and you’ll discover how to produce richer foam efficiently—more tips lie just ahead.
Key Takeaways
- Adjust nozzle size and shape to optimize foam aeration and spray pattern for thicker foam.
- Fine-tune water pressure to balance foam stability without breaking bubbles or wasting soap.
- Use the correct soap-to-water ratio, increasing soap concentration for denser, clingier foam.
- Regularly clean and calibrate the foam cannon to prevent clogs and ensure consistent foam quality.
- Monitor foam thickness during application and make incremental adjustments to achieve optimal results.

Tool Daily Foam Cannon with 1/4 Inch Quick Connector, 1 Liter, 5 Pressure Washer Nozzle Tips
- Adjustable Snow Foam Lance: Fits 1/4 inch quick connection
- Large 1 Liter Capacity: Holds enough soap for extended use
- High Working Pressure: Operates between 1000 PSI and 3000 PSI
As an affiliate, we earn on qualifying purchases.
As an affiliate, we earn on qualifying purchases.
Why Your Foam Cannon Isn’t Producing Thick Foam (And How to Fix It)
If your foam cannon isn’t producing thick foam, the problem is often related to water pressure, soap mixture, or nozzle settings. Poor foam consistency can stem from using soap that isn’t compatible with your foam cannon, leading to thin, patchy foam. Make certain you’re selecting a soap specifically designed for foam cannons, as incompatible soaps won’t produce the desired thickness. Additionally, check your water pressure—too low or too high can affect foam quality. Adjust your nozzle settings to optimize foam production, making sure the mixture is properly aerated. Proper soap compatibility and correct water pressure are vital for thick, luxurious foam. Maintaining the correct foam cannon calibration can significantly improve foam thickness and consistency. Additionally, ensuring consistent water flow rate helps maintain optimal foam production, preventing fluctuations that could weaken foam quality. To further enhance foam quality, consider adjusting spray nozzle settings to ensure optimal foam mixing and aeration. You can also optimize your setup by monitoring water pressure regularly to prevent inconsistencies. Regularly inspecting your soap mixture ratio can help maintain the ideal foam consistency over time. By addressing these factors, you’ll achieve better foam consistency and improve your overall washing experience.
How Foam Cannon Mechanics Affect Foam Thickness

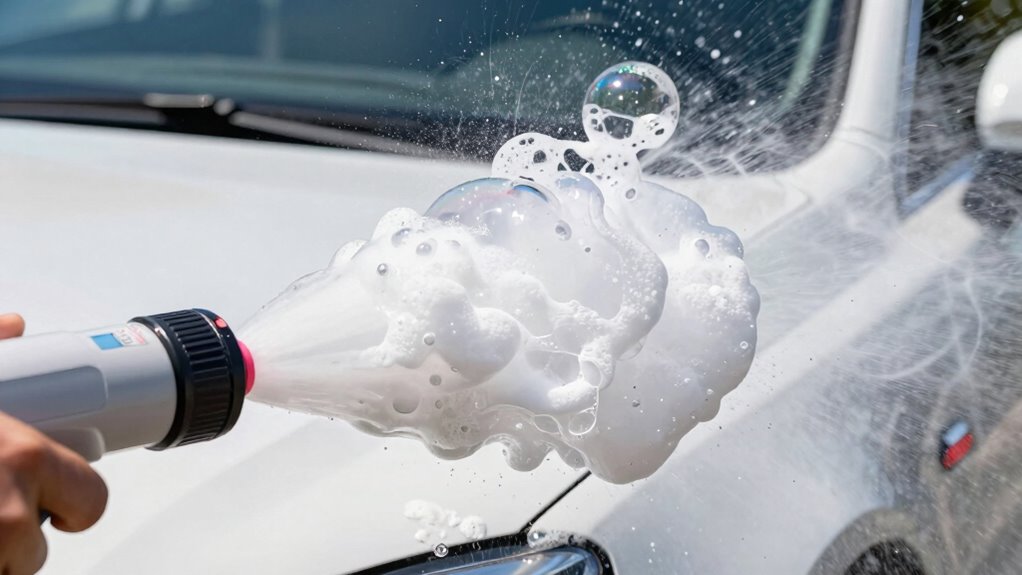
The mechanics of your foam cannon play a crucial role in determining the thickness of the foam it produces. Foam consistency depends heavily on the nozzle design, which influences how air and soap mix. A well-designed nozzle creates a fine, stable foam by ensuring proper atomization and mixing. If the nozzle is too large or poorly shaped, the foam may be thin and runny. Conversely, a nozzle that produces too much pressure can break apart foam bubbles, reducing thickness. Adjusting the nozzle’s size or shape affects the spray pattern and foam quality. Understanding these mechanics helps you achieve richer foam without wasting soap. Proper nozzle design and tuning the pressure are essential for optimizing foam consistency for thick, clingy foam that lasts longer on surfaces. Additionally, factors such as air-to-soap ratio can significantly influence foam density and stability. Maintaining the correct pressure settings ensures consistent foam output and optimal performance. Recognizing how foam formation depends on these variables can help you fine-tune your equipment for the best results. Paying attention to foam stability can also improve how long the foam adheres to surfaces before breaking down.
How to Adjust Water and Soap Ratios for Richer Foam

To get richer foam, start by adjusting the water volume in your foam cannon. Increasing soap concentration can also boost foam thickness, but be careful not to overdo it. Experiment with these ratios to find the perfect balance for your cleaning needs. Additionally, using the right cycling gear maintenance techniques can help ensure your foam cannon stays in optimal condition for consistent results. Proper cannon calibration is essential for maintaining foam quality, and regularly checking cable failures can prevent disruptions in your setup. Remember that maintaining proper filtering and pump protection can significantly improve foam quality and consistency over time.
Adjust Water Volume
Adjusting the water volume in your foam cannon directly impacts the thickness and clinginess of the foam. More water results in a lighter foam with less foam consistency, while less water creates a denser, richer foam. Changing the water flow also affects the spray pattern, influencing how evenly the foam spreads across your vehicle. To fine-tune, start by gradually decreasing water volume for thicker foam or increasing it for a more liquid consistency. Use the table below to visualize these adjustments:
| Water Volume | Foam Consistency | Spray Pattern |
|---|---|---|
| High | Light, airy | Wide, diffuse |
| Moderate | Balanced | Even, controlled |
| Low | Thick, clingy | Focused, narrow |
Additionally, paying attention to the foam dispersion can help optimize coverage and ensure a thorough cleaning. Proper soap-to-water ratios are essential for achieving the best foam quality without wasting soap or reducing cleaning efficiency. Adjusting water and soap ratios carefully can prevent wasting soap while still achieving rich foam. Regularly checking the foam thickness during application can help maintain consistent quality. Moreover, understanding the water flow settings can assist in customizing the foam for different cleaning tasks.
Modify Soap Concentration
Want richer foam from your foam cannon? Adjusting the soap dilution is key. Using less soap relative to water increases foam consistency, creating a thicker, creamier layer that clings better to your vehicle. Start by reducing the soap concentration gradually—try a 1:10 or 1:12 ratio instead of the standard 1:3 or 1:5. This tweak prevents over-dilution, which can weaken foam quality. Keep in mind, too much water will produce a more bubbly, less dense foam, while a higher soap ratio yields richer foam. Experiment with small adjustments until you find the perfect balance that delivers thick, clingy foam without wasting soap. Proper soap dilution lets you maximize foam quality while keeping your soap consumption efficient. Understanding foam consistency helps you achieve the best cleaning results with minimal soap.
Tuning Your Foam Cannon Nozzle for Better Coverage and Density

To improve your foam coverage and density, start by adjusting the nozzle aperture to control the foam thickness. Next, optimize your water pressure to make sure the foam stays rich and consistent. Additionally, choosing the proper soap ratio helps you maximize foam output and achieve the perfect balance between foam volume and cling. Ensuring your household tools are well-maintained can also help maintain consistent foam quality.
Adjust Nozzle Aperture
Have you ever wondered how the size of your foam cannon’s nozzle opening affects the quality of your foam? Adjusting the nozzle aperture directly influences the foam’s thickness and coverage. A smaller nozzle size increases foam density but reduces spray coverage, while a larger nozzle provides broader spray angles, covering more surface area. To optimize your foam, consider these points:
- Nozzle size: Find a balance that produces thick foam without excessive soap waste.
- Spray angle: A wider angle ensures even coverage on larger surfaces.
- Flow rate: Adjust based on nozzle size and desired foam density. Proper equipment tuning can maximize efficiency and foam quality. Additionally, understanding the principles of hormesis can help you fine-tune your cleaning process to achieve optimal results with minimal soap usage.
Optimize Water Pressure
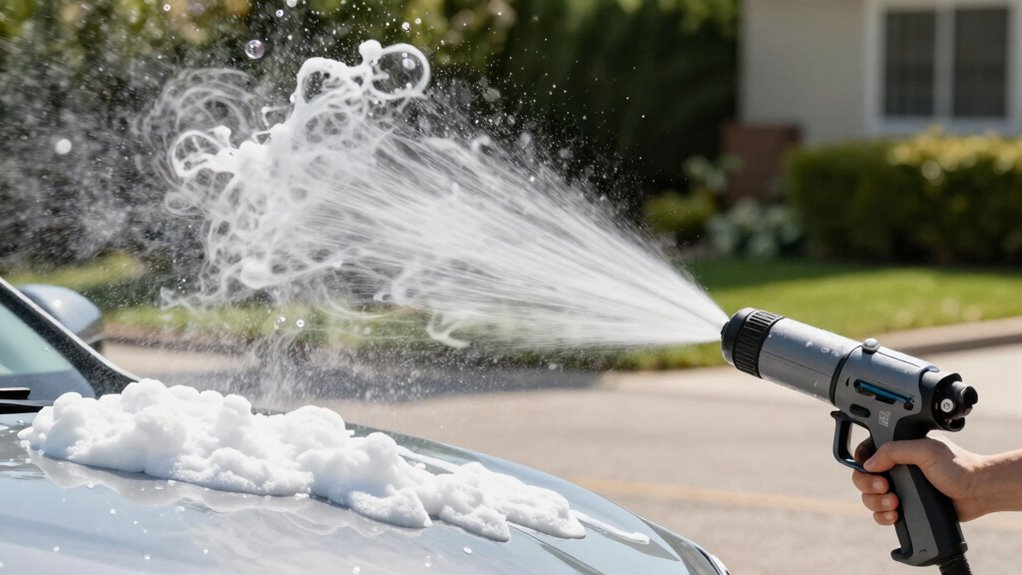
Ever wondered how water pressure impacts your foam cannon’s performance? Proper pressure regulation is key to achieving thick, clinging foam. If water flow is too high, the foam becomes thin and watery, wasting soap and reducing coverage. Conversely, too little pressure can result in sparse foam that doesn’t stick well. To optimize, start by adjusting your pressure regulator to ensure a steady, moderate water flow. You want enough pressure to atomize the soap into a rich foam, but not so much that it disperses too quickly. Consistently monitor the foam consistency as you fine-tune the pressure. Finding the right balance allows your foam cannon to produce dense foam with minimal soap wastage, giving you better coverage and more effective cleaning.
Select Proper Soap Ratio
After setting the right water pressure, focusing on the soap ratio helps optimize foam density and coverage. Proper soap dilution is essential for achieving consistent foam and avoiding waste. To get the best results, consider these tips:
- Use the manufacturer’s recommended soap dilution ratio to ensure ideal foam consistency.
- Adjust the soap-to-water mix gradually, testing foam quality after each change.
- Remember that a thicker foam isn’t always better; find the balance between density and coverage for your needs.
Troubleshooting Common Foam Cannon Tuning Problems
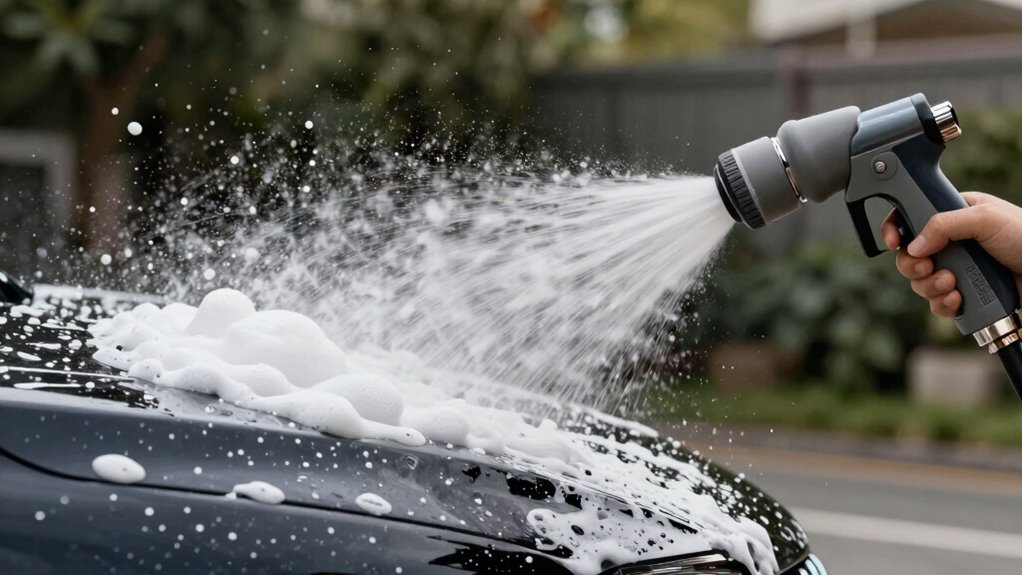
Troubleshooting common foam cannon tuning problems can save you time and frustration during your detailing sessions. If your foam isn’t thick enough or the quality is poor, start by checking your nozzle maintenance. A clogged or worn nozzle can disrupt proper foam formation, leading to thin or inconsistent foam. Regularly clean the nozzle and replace it if necessary to guarantee optimal spray patterns. Additionally, verify that your soap ratio is correct, as too much or too little soap can impact foam quality. Adjusting the pressure or nozzle opening may also help improve foam thickness. By maintaining your nozzle and assuring proper soap mixture, you can resolve many common tuning issues and achieve a consistent, thick foam for effective cleaning.
Tips to Keep Your Foam Cannon Working Perfectly Over Time
Want your foam cannon to perform consistently every time you use it? Proper maintenance is key. First, choose the right microfiber selection for cleaning and drying your equipment—soft, high-quality microfiber reduces scratches and keeps parts in top shape. Second, implement effective storage techniques by keeping your foam cannon in a cool, dry place and ensuring it’s empty of leftover soap after each use, preventing clogs and corrosion. Third, regularly inspect and clean the nozzle and connections to avoid buildup that can diminish foam quality. These simple practices ensure your foam cannon stays in peak condition, delivering thick foam every time. By paying attention to microfiber selection and storage techniques, you extend its lifespan and keep your detailing game sharp.
Frequently Asked Questions
What Types of Soap Are Best for Thick Foam?
You should choose soaps specifically designed for foam cannons, as they create thicker, richer foam. Look for soap selection that mentions excellent foam consistency and high lubricity. Dilute these soaps properly to avoid wasting soap while maintaining a dense foam. Avoid harsh detergents or dish soaps, which can damage your paint. Using the right soap guarantees your foam stays thick and clingy, making your wash more efficient and effective.
Can Temperature Affect Foam Quality and Thickness?
Temperature effects your foam quality considerably. When it’s hot, soap viscosity decreases, making it harder to produce thick foam, while cold weather increases viscosity, leading to richer foam. You’ll notice that in warmer conditions, foam tends to be lighter and less clingy, whereas in colder weather, it sticks better and stays thicker longer. To maintain consistent foam, adjust your soap dilution or pre-wet your surface, especially when temperatures fluctuate.
How Often Should I Clean My Foam Cannon?
You should clean your foam cannon after every few uses to maintain peak cleaning performance and soap longevity. Regular cleaning prevents soap buildup and clogs, ensuring thick foam every time. Use warm water and a soft brush or nozzle cleaner to remove residue. Consistent cleaning not only prolongs your foam cannon’s lifespan but also guarantees you get the best foam thickness without wasting soap, making your washing more efficient.
Does the Pressure Washer’s PSI Impact Foam Density?
Did you know that increasing your pressure washer’s PSI by just 500 can substantially improve foam density? The pressure impact directly affects foam consistency, making it thicker and more clingy. Higher PSI helps push soap deeper into the surface, creating a richer foam layer. Just be careful not to exceed your foam cannon’s recommended pressure, or you might damage it. Adjust your PSI carefully for ideal foam without waste.
Are There Specific Nozzle Sizes for Different Foam Thicknesses?
Yes, your nozzle size directly affects foam consistency. A smaller nozzle size creates more pressure, resulting in thicker foam, while a larger nozzle produces thinner foam. For thicker foam, use a nozzle with a smaller orifice to increase spray pressure and improve foam density. Conversely, a larger nozzle is better for lighter foam. Adjusting nozzle sizes helps you get the perfect foam thickness without wasting soap or water.
Conclusion
When your foam cannon finally starts producing thick foam just when you need it most, it’s no coincidence. Tuning your setup might take a little patience, but it’s worth the effort. With the right water-soap mix, nozzle adjustments, and routine care, you’ll always get that perfect, rich foam—saving soap and time in the process. So, stay tuned and keep experimenting; often, the best foam comes when you least expect it.