To replace your brake pads yourself, gather the proper tools like a jack, lug wrench, socket set, C-clamp, and screwdriver. Choose the right pad material—organic, semi-metallic, or ceramic—based on your driving style and budget. Carefully lift your vehicle, remove the wheels, calipers, and old pads, then use the C-clamp to compress the piston. Reassemble everything securely, tighten lug nuts properly, and pump the brake pedal. If you’re ready to learn more, continue for detailed steps and safety tips.
Key Takeaways
- Gather essential tools like a jack, jack stands, lug wrench, socket set, and caliper piston tool before starting.
- Choose the appropriate brake pad material—organic, semi-metallic, or ceramic—based on your driving needs and budget.
- Properly lift and secure the vehicle, then remove the wheels to access the brake caliper and rotor.
- Use a C-clamp to compress the caliper piston and support the caliper to prevent damage during pad replacement.
- After installing new pads, tighten all components, replace the wheel, lower the vehicle, and pump the brake pedal to ensure safety.
Replacing your brake pads yourself can save money and give you a better understanding of your vehicle’s maintenance. When starting this project, knowing the different brake pad materials is vital. Brake pads come in various types, including organic, semi-metallic, and ceramic. Organic pads are softer and quieter but wear out faster, while semi-metallic pads are more durable and handle heat better, making them suitable for heavier vehicles or aggressive driving. Ceramic pads offer quiet operation and produce less dust but tend to be pricier. Selecting the right brake pad material depends on your driving style and budget. Once you’ve chosen the appropriate pads, gathering the necessary replacement tools is your next step. Basic tools include a jack, jack stands, lug wrench, socket set, C-clamp, brake caliper piston tool, and screwdrivers. These tools make the removal and installation process straightforward and safe. Using proper replacement tools ensures you won’t damage components and helps you work efficiently.
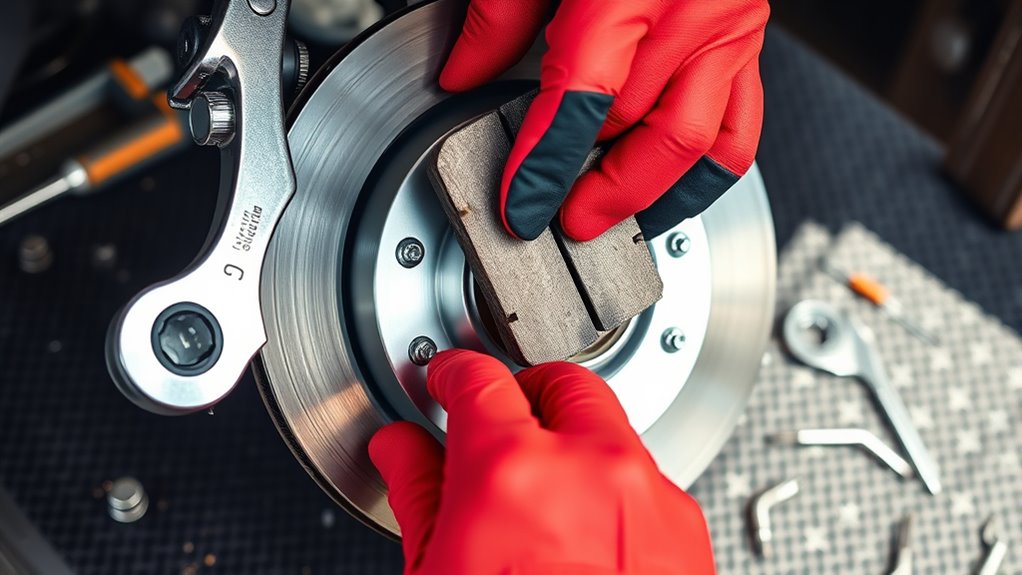
Before diving in, guarantee your vehicle is parked on a level surface, with the parking brake engaged. Loosen the lug nuts slightly before lifting the vehicle for safety. Use the jack to lift the car and secure it with jack stands. Remove the wheels to access the brake assembly. Next, locate the brake caliper and remove the bolts holding it in place. Carefully slide the caliper off the rotor, supporting it with a wire or bungee cord to avoid putting stress on the brake hose. Now, you’ll see the old brake pads nestled inside the caliper. Use a screwdriver or a pry tool to gently remove the old pads if they’re stuck. Before installing new pads, use a C-clamp to compress the caliper piston, making room for the new, thicker pads. This step is vital because it resets the caliper to fit the new brake pads properly.
When installing the new brake pads, double-check that they match the old ones in size and material. Slide them into the caliper bracket, ensuring they’re seated correctly. Reassemble the caliper, tighten the bolts, and then replace the wheel, tightening lug nuts in a star pattern to ensure even pressure. Lower the vehicle and finish tightening the lug nuts securely. Before driving off, pump the brake pedal a few times to help the brake pads seat properly against the rotors. Remember, proper use of brake pad materials and replacement tools guarantees a safe, effective, and long-lasting brake repair. Additionally, understanding the benefits of airless paint sprayers can help you save time and effort on various DIY projects around your home. With patience and attention to detail, you can successfully replace your brake pads and gain confidence in your vehicle maintenance skills.
Frequently Asked Questions
How Do I Choose the Right Brake Pads for My Vehicle?
To select the appropriate brake pads, start by considering the brake pad materials that suit your driving needs, such as ceramic for quieter stops or semi-metallic for better heat dissipation. Always check vehicle compatibility by referencing your car’s make, model, and year. This guarantees you choose pads designed specifically for your vehicle’s braking system. Doing so ensures peak performance, safety, and longevity for your brake system.
Can I Replace Brake Pads Without Professional Tools?
You can replace brake pads without professional tools, but it’s like trying to paint a masterpiece with a butter knife—possible, but challenging. Hand tool alternatives, like screwdrivers and pliers, can help, but you must be cautious of parking brake considerations to avoid uneven wear. Without proper tools, you risk damaging components or compromising safety. If you’re unsure, it’s wise to seek professional help for a smooth, safe ride.
How Long Does a DIY Brake Pad Replacement Typically Take?
You can expect a DIY brake pad replacement to take about 1 to 3 hours, depending on your experience, brake pad materials, and vehicle compatibility. If you’re familiar with your vehicle’s setup, it might be quicker, but new or complex brake systems could extend the process. Be patient, follow instructions carefully, and guarantee you have the right tools and replacement parts to avoid delays or mistakes.
What Safety Precautions Should I Follow During Brake Pad Replacement?
Before you start, remember safety is no “Mad Men” episode—stay alert! Always wear personal protective equipment like gloves and goggles to shield yourself from brake dust and debris. Guarantee your workspace is well-ventilated, clean, and free of hazards. Keep tools organized, and never work under a vehicle supported only by a jack—use jack stands for stability. Prioritizing workspace safety keeps you safe and your project on track.
How Can I Tell if My Brake Pads Need Replacement Early?
You can tell your brake pads need replacement early if you notice brake noise, like squealing or grinding, or if you feel pedal vibration when braking. These signs indicate worn-out pads or uneven wear. Regularly check the thickness of your brake pads—if they’re less than a quarter inch thick, it’s time to substitute them. Addressing these early signs helps prevent more serious brake issues and ensures your safety.
Conclusion
Replacing your brake pads yourself might seem intimidating, but with the right tools and care, it’s a rewarding skill. While the process requires patience and attention to detail, the satisfaction of saving money and understanding your vehicle is worth it. Think of it as balancing precision with simplicity—like tuning an instrument. When done correctly, you’ll enjoy safer, smoother stops. So, embrace the challenge and turn a potentially stressful task into a confidence-boosting accomplishment.