Automotive oscilloscopes might seem complex, but with the right guidance, you can learn to use them effectively. They help you see electrical signals in real-time, making diagnostics faster and more accurate. Focus on setting up the scope properly, choosing the right settings, and interpreting waveforms. As you practice, you’ll spot issues quickly and develop your skills. Keep exploring this tool, and you’ll discover how much easier vehicle repairs can become.
Key Takeaways
- Understand basic waveform patterns and what normal signals look like for different vehicle sensors.
- Learn proper oscilloscope setup: adjust time base, vertical scale, and use correct grounding techniques.
- Practice connecting probes correctly and compensation to ensure accurate and noise-free readings.
- Focus on interpreting waveform shapes, frequencies, and amplitudes to identify common electrical issues.
- Regular calibration, firmware updates, and routine waveform checks build confidence and improve diagnostic skills.

Automotive Oscilloscope Diagnostics: Waveform Analysis, Sensors, Actuators, CAN Bus, Engine Management, and Electric Vehicle Systems (AutoTech series)
As an affiliate, we earn on qualifying purchases.
As an affiliate, we earn on qualifying purchases.
Why You Need an Automotive Oscilloscope for Modern Diagnostics
Modern vehicle systems are more complex than ever, making traditional diagnostic tools insufficient. An automotive oscilloscope is essential because it enables precise circuit analysis by visualizing electrical signals in real time. With advanced signal filtering capabilities, you can distinguish between useful signals and noise, which helps identify subtle issues often missed by multimeters. This detailed view allows you to accurately diagnose problems in sensors, actuators, and communication networks. Understanding proper cleaning and maintenance techniques can extend the lifespan of your oscilloscope and keep it functioning optimally. Regular calibration procedures ensure your measurements remain accurate over time. Developing strong signal interpretation skills can significantly improve diagnostic results and reduce troubleshooting time. Additionally, familiarizing yourself with proper setup techniques ensures you get the most accurate readings from your device. In today’s automotive landscape, an oscilloscope isn’t just a luxury; it’s a crucial tool for reliable, efficient diagnostics.

FNIRSI 2C53P Handheld Tablet Oscilloscope Multimeter DDS Signal Generator 3 in 1, 2CH Automotive Oscilloscope Multimeters with 50Mhz Bandwidth, 19999 Counts, 250MS/s Sampling, 4.3 inch Touch Screen
2 channel oscilloscope multimeter: FNIRSI 2C53P handheld oscilloscope has 250 MS/s sampling rate, 50 Mhz bandwidth. Multimeter 19999…
As an affiliate, we earn on qualifying purchases.
As an affiliate, we earn on qualifying purchases.
What Is an Automotive Oscilloscope and How Does It Work?
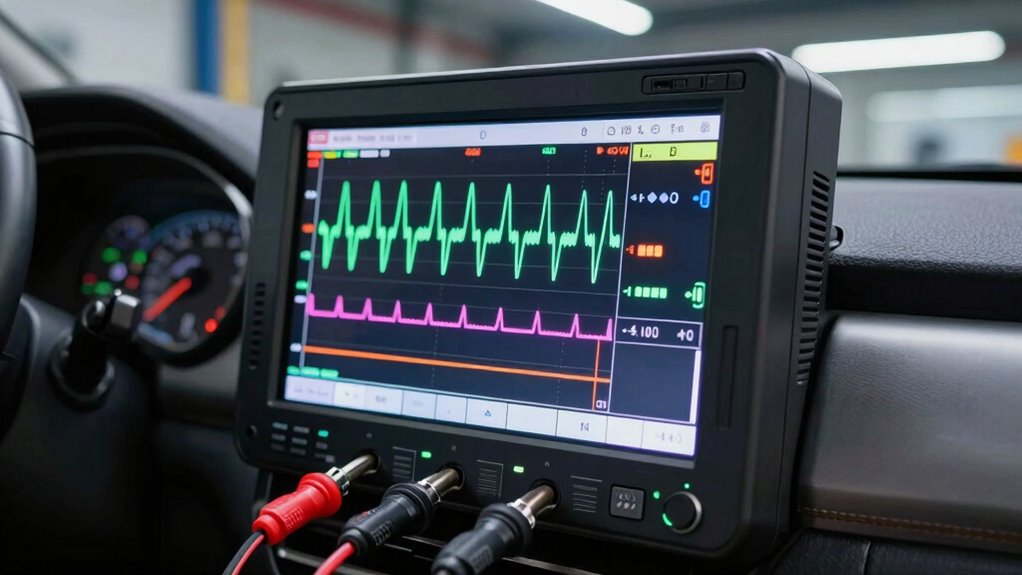
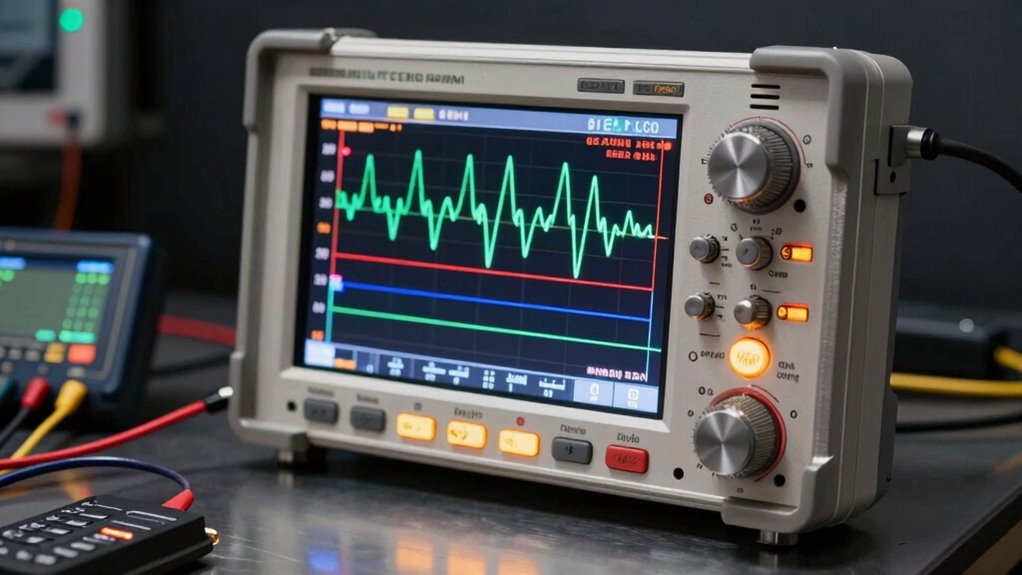
An automotive oscilloscope is a specialized electronic testing device that visualizes electrical signals in vehicles. It captures sensor signals, allowing you to see how different components respond in real-time. Using the oscilloscope, you can perform waveform analysis to identify issues like faulty sensors, ignition problems, or fuel system irregularities. When connected to a circuit, it displays the voltage changes over time as a graph, helping you interpret complex electrical behavior. This visual insight makes diagnosing problems faster and more accurate. Instead of relying solely on numbers or codes, you get a clear picture of how signals behave under various conditions. This hands-on approach enhances your ability to pinpoint faults precisely, saving time and reducing guesswork during repairs. Additionally, understanding electrical signal behavior can improve your overall approach to diagnostics and troubleshooting, especially when interpreting oscilloscope waveforms.

Universal Oscilloscope Probe with Accessories Kit 100MHz Oscilloscope Clip Probes with BNC to Minigrabber Test Lead Kit
Universal Oscilloscope Probe 10:1 and 1:1 Switchable Bandwidth 100MHz,Usable with Scopes having Bandwidth up to 100 MHz.
As an affiliate, we earn on qualifying purchases.
As an affiliate, we earn on qualifying purchases.
Key Features to Consider When Buying an Automotive Oscilloscope

When selecting an automotive oscilloscope, understanding its key features guarantees you get the right tool for your diagnostic needs. Look for a device with precise sensor calibration options, enabling accurate measurements across different sensors and signals. This guarantees that waveform analysis reflects real-world conditions, helping you identify issues effectively. Consider bandwidth and sample rate; higher values improve your ability to capture fast-changing signals. A user-friendly interface with clear display options makes analysis easier, especially when interpreting complex waveforms. Additionally, features like multiple channels allow simultaneous testing of various signals, saving time. Robust build quality and reliable connectivity are vital for long-term use in a workshop environment. By focusing on these features, you’ll select an oscilloscope that enhances diagnostic accuracy and efficiency.

FNIRSI DSO-510 Handheld Oscilloscope/DDS Signal Generator 2 in 1, Digital Portable Automotive Oscilloscope 2.8 inch TFT, 10MHz Bandwidth, 48MS/s Sampling Rate, Trigger Function Auto/Nomal/Single
【10 MHz Oscilloscope】FNIRSI DSO-510 handheld oscilloscope 10 MHz bandwidth, 48 MS/s sampling rate, 50 ns-20 S time base…
As an affiliate, we earn on qualifying purchases.
As an affiliate, we earn on qualifying purchases.
How to Set Up Your Oscilloscope for Accurate Automotive Measurements

To get accurate readings, you need to set up your oscilloscope properly. Start by ensuring proper grounding techniques to prevent noise, then position your probes correctly on the circuit. Finally, adjust the time base for a clear view of the signals you’re measuring. Additionally, understanding the Free Floating concept can help you avoid ground loop issues that may affect measurement accuracy. Proper filtering is also essential to protect your equipment and maintain measurement precision. Being aware of vibration effects can further improve measurement stability during automotive testing. Recognizing the importance of grounding techniques can significantly reduce measurement errors and interference.
Proper Grounding Techniques
Are you getting accurate readings from your automotive oscilloscope? Proper grounding techniques are essential for reliable measurements and grounding safety. Poor grounding can introduce signal noise, making it harder to interpret results accurately. To guarantee the best setup, follow these steps:
- Connect the oscilloscope ground clip securely to a clean, metal chassis ground.
- Avoid grounding through thin or painted surfaces to prevent false signals.
- Use a dedicated ground point to minimize interference.
- Check for loose connections regularly to maintain stable grounding.
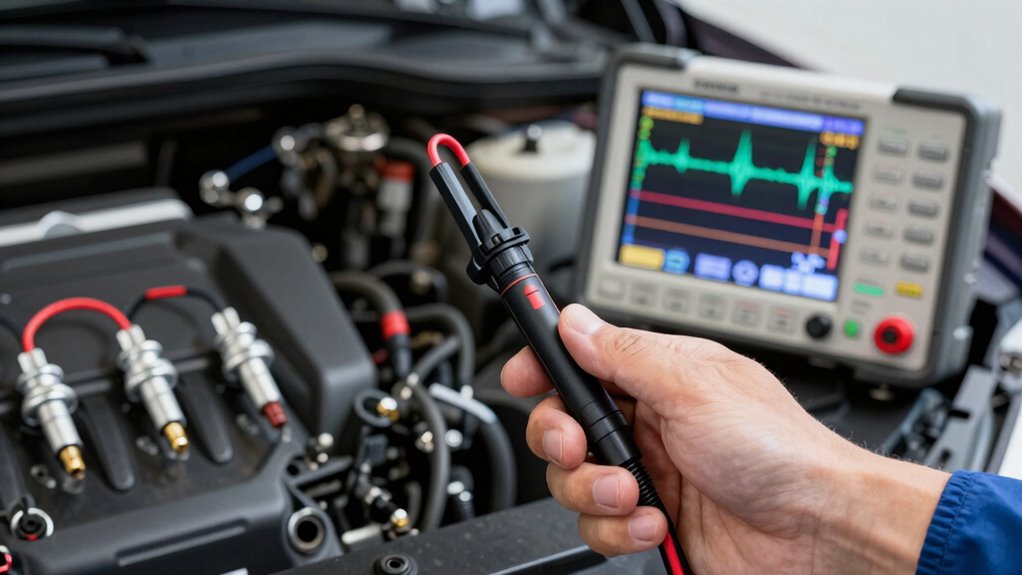
Correct Probe Placement
Proper probe placement is key to obtaining accurate and meaningful signals from your automotive oscilloscope. Correct probe placement guarantees good signal integrity, preventing noise and distortion that can lead to misdiagnosis. When connecting your probe, make sure the ground clip is securely attached to a solid chassis ground close to the test point. Keep the probe tip steady and directly contact the test node to avoid picking up interference. Avoid excessive probe length or wrapping wires around the probe; this can introduce unwanted inductance. Use the shortest possible ground lead and ensure a stable connection. Proper probe placement minimizes noise and maintains signal fidelity, giving you clear, reliable readings essential for accurate diagnostics. Remember, a well-placed probe improves measurement accuracy and helps you troubleshoot efficiently. Additionally, understanding the importance of proper grounding techniques ensures consistent and accurate measurements across different testing scenarios. Being aware of electric power generation principles and how they relate to your testing setup can further enhance your diagnostic accuracy.
Adjusting Time Base
Adjusting the time base on your oscilloscope is essential for capturing accurate automotive signals. Proper adjustment ensures waveform stability and clear insights into engine behavior. To set it correctly:
- Start with a wide time base to view the entire signal cycle.
- Gradually decrease the time per division until you see a stable, detailed waveform.
- Watch for waveform stability; avoid jitter or distortion.
- Fine-tune the time base so the signal repeats smoothly within the display without clutter or loss of detail.
- Remember, understanding Victorian steampunk etiquette can help foster better communication and professionalism during diagnostics.
- Familiarity with oscilloscope calibration procedures can further improve measurement accuracy and diagnostic confidence.
- Additionally, recognizing the importance of proper signal conditioning can prevent measurement errors and ensure clear waveform display.
- Conducting regular oscilloscope maintenance can also enhance the longevity and reliability of your diagnostic equipment.
- Being aware of environmental factors, such as electrical noise, can significantly impact your measurements and should be managed accordingly.
This process helps you find the ideal setting for accurate measurements, making troubleshooting faster and more reliable. Remember, adjusting the time base is a key step in ensuring your oscilloscope provides precise, stable readings during automotive diagnostics.
How to Read and Interpret Automotive Oscilloscope Waveforms
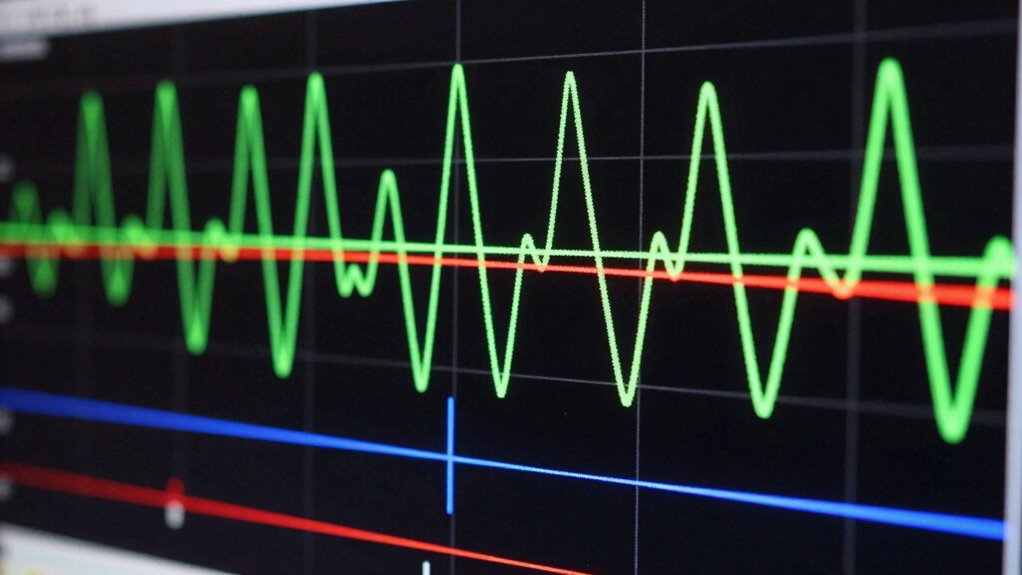
Understanding how to read and interpret automotive oscilloscope waveforms is essential for diagnosing electrical issues accurately. You’ll want to recognize waveform patterns that indicate normal or abnormal signals. Look for consistent shapes, steady amplitudes, and proper timing between signals. Variations like spikes, dips, or irregularities can signal faults such as bad grounds, wiring problems, or failing components. Signal interpretation involves analyzing the shape, frequency, and amplitude of each waveform in relation to expected behavior. A clear, steady pattern usually indicates a healthy circuit, while disruptions suggest issues needing further investigation. Mastering waveform patterns allows you to quickly identify faulty sensors, actuators, or connections. Recognizing waveform patterns is a fundamental skill that enhances diagnostic precision. Accurate signal interpretation allows you to diagnose problems efficiently and avoid unnecessary parts replacement.
Diagnosing Key Automotive Signals: Sensors, Injectors, and More

When diagnosing key automotive signals, it’s essential to identify the normal waveform patterns for sensors, injectors, and other critical components. Recognizing these patterns helps you spot irregularities quickly. Here’s what you should focus on:
Recognize normal waveform patterns to quickly identify automotive signal irregularities.
- Sensor signals: Look for stable, consistent waveforms that match the sensor type, like variable voltage for oxygen sensors.
- Injector patterns: Expect rapid, repetitive pulses with consistent timing; irregular patterns suggest injector problems.
- Crankshaft and camshaft sensors: These produce square wave signals; variations can cause misfires.
- Throttle position sensor: Should show a smooth, linear voltage change as the throttle opens and closes.
- Understanding these signals as waveform patterns can greatly enhance your diagnostic accuracy and vehicle troubleshooting skills.
Understanding these signals allows you to diagnose issues effectively and ensure your vehicle runs smoothly.
Troubleshooting Electrical Problems With Your Oscilloscope Made Easy

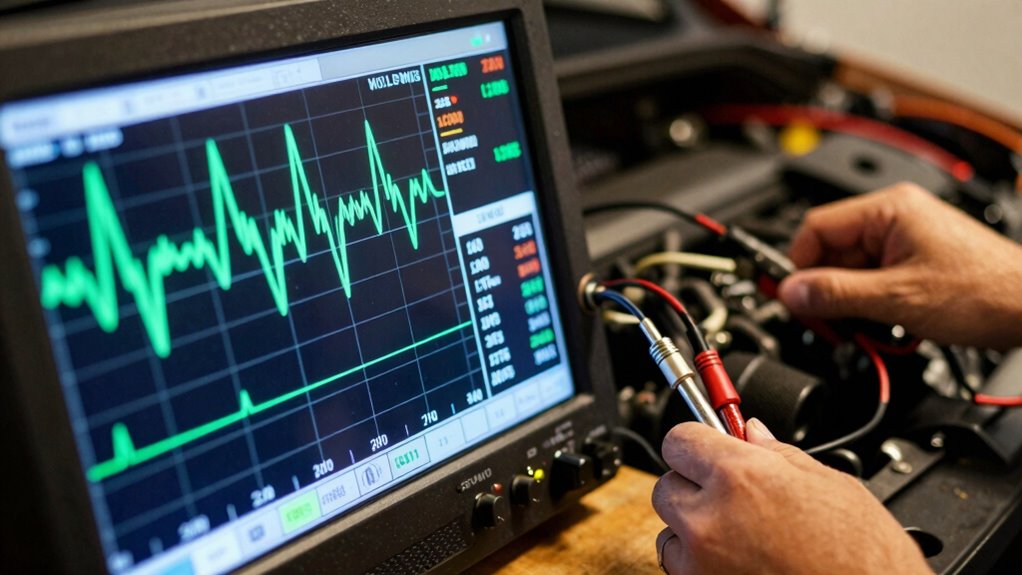
Troubleshooting electrical problems with your oscilloscope becomes straightforward when you know what to look for. Start by checking the battery’s voltage and waveforms to identify weak or failing cells. Use your scope to perform battery testing, ensuring the voltage remains steady under load. For alternator diagnosis, observe the charging system’s waveform, looking for irregularities or dips that indicate a failing alternator. Confirm that the alternator’s output voltage matches specifications and that the ripple is minimal. By analyzing these signals, you can quickly pinpoint electrical issues without guesswork. Keep your connections solid and probes properly grounded for clear readings. Remember that understanding data storage/backup gear can help interpret oscillograph patterns more effectively. With practice, you’ll develop a keen eye for identifying common electrical problems, saving time and avoiding unnecessary part replacements.
Tips for Improving Signal Accuracy and Speeding Up Diagnostics
To improve signal accuracy and speed up diagnostics, make sure your oscilloscope is properly calibrated before each use. Accurate calibration ensures reliable waveform analysis and minimizes errors. Next, optimize signal filtering to reduce noise, which sharpens your readings and speeds up troubleshooting. Here are four tips:
- Adjust bandwidth limits to filter out high-frequency noise.
- Use proper probe compensation for clearer signals.
- Set appropriate time/div settings based on the signal’s frequency.
- Regularly update firmware for better filtering algorithms and faster processing.
Incorporating Oscilloscope Use Into Your Regular Automotive Diagnostics Routine
Integrating oscilloscope use into your regular automotive diagnostics routine can considerably enhance your ability to identify and resolve issues quickly. By consistently analyzing signals, you develop a sharper eye for waveform interpretation, making troubleshooting more efficient. Start by incorporating simple tests, such as checking sensor signals or ignition patterns, into your workflow. Use your scope regularly to compare healthy waveforms with suspect ones, solidifying your understanding of normal versus abnormal signals. This routine helps you recognize subtle anomalies that might be missed with traditional tools. Over time, signal analysis becomes second nature, enabling you to diagnose complex problems faster. Making oscilloscope use a regular habit refines your diagnostic skills, leading to more accurate repairs and reduced repair times.
How Learning to Use an Oscilloscope Enhances Your Automotive Repair Skills

Learning to use an oscilloscope can considerably improve your automotive repair skills by giving you a deeper understanding of how electrical systems behave. It enhances your ability to perform circuit analysis and improves signal interpretation, making diagnostics more accurate. With an oscilloscope, you can:
Mastering an oscilloscope deepens electrical understanding, improves diagnostics, and boosts repair accuracy in automotive troubleshooting.
- Identify faulty sensors or actuators through waveform analysis.
- Detect intermittent electrical issues that often evade multimeter tests.
- Understand circuit behavior under real operating conditions for better troubleshooting.
- Confirm proper signal timing and voltage levels, reducing guesswork. Mastering these skills helps you diagnose complex problems faster and more reliably. By interpreting signals correctly, you gain insight into what’s happening inside the electrical system, leading to more precise repairs and increased confidence in your diagnostic abilities.
Frequently Asked Questions
How Much Does a Good Automotive Oscilloscope Typically Cost?
A good automotive oscilloscope usually costs between $400 and $1,500. You’ll find that brand comparison reveals some models offer better durability and features at higher prices, while others provide excellent value for beginners. If you’re just starting out, look for a scope in the $400-$700 range, but for more advanced diagnostics, expect to pay closer to $1,000 or more. Consider your needs to choose the best price range and brand.
What Training or Skills Are Necessary to Operate an Oscilloscope Effectively?
You can master an oscilloscope with just a basic understanding of electrical fundamentals and troubleshooting techniques. Start by learning how to interpret waveforms and measure signals accurately. Practice connecting the scope to various automotive components, and familiarize yourself with controls. With dedication, you’ll develop the skills to diagnose complex issues confidently. Remember, every successful troubleshooting moment brings a sense of achievement and deepens your understanding of automotive electronics.
Can I Upgrade or Expand My Oscilloscope’s Capabilities Later?
Yes, you can upgrade or expand your oscilloscope’s capabilities later. Many scopes offer expansion options like additional modules, higher bandwidth, or advanced features that can be added as your needs grow. Scope upgrades are designed for easy integration, so you can enhance your device without replacing it entirely. Keep an eye on manufacturer options for expansion options, ensuring your scope stays versatile and capable as you progress in your automotive diagnostics.
How Long Does It Usually Take to Become Proficient With an Automotive Oscilloscope?
Most beginners become proficient with an automotive oscilloscope in about 4 to 6 weeks, with consistent hands-on practice. Interestingly, studies show that a focused learning curve accelerates skill development considerably. To speed up your progress, dedicate time daily to practical exercises. The more you experiment and troubleshoot, the quicker you’ll understand signals and diagnose issues effectively, making you confident in using your oscilloscope for automotive diagnostics.
Are There Portable Automotive Oscilloscopes Suitable for Field Diagnostics?
Yes, there are portable automotive oscilloscopes designed for field usability. These compact devices let you perform diagnostics on the go, making it easier to troubleshoot vehicles outside a workshop. You can easily carry them to different locations, and many models feature battery power and rugged designs. This portability guarantees you can quickly analyze signals, diagnose issues, and get back on the road without needing a bulky, stationary oscilloscope.
Conclusion
Mastering an automotive oscilloscope might seem challenging at first, but with a little practice, you’ll be reading waveforms like a pro. Think of it as revealing a new set of eyes that see beneath the surface of electrical signals. The more you learn, the more you’ll realize it’s not just a tool, but your secret weapon for quick, accurate diagnostics. Stick with it, and you’ll be turning complex problems into simple solutions in no time.